How To Tile Successfully

We've teamed up with Vitrex to provide specialist advice and expertise for any tiling project.
Preparation
Wall Tiles
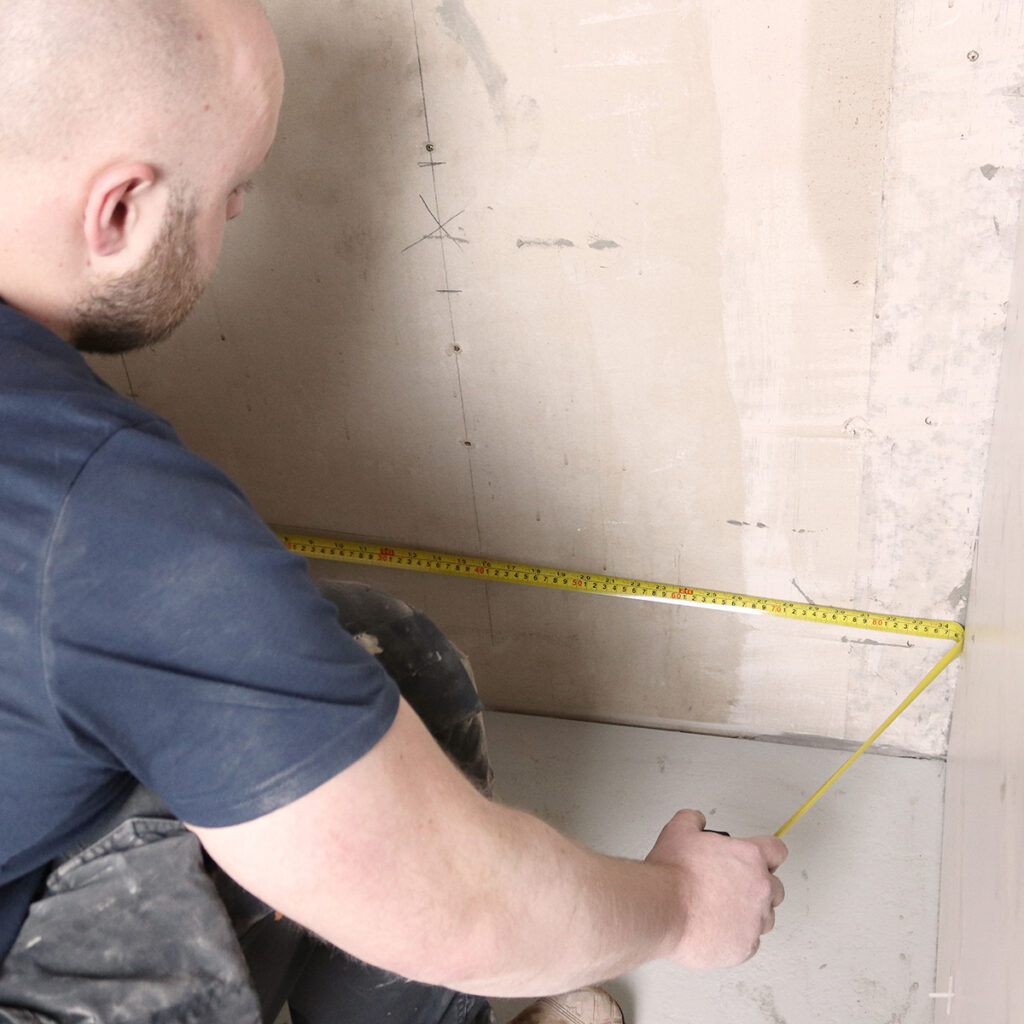
Ensure the surface is as flat as possible. Use a spirit level to ensure the wall is level.

Measure the wall dimensions using a tape measure and find the centre of the wall, so you can work out the start point of the tile.
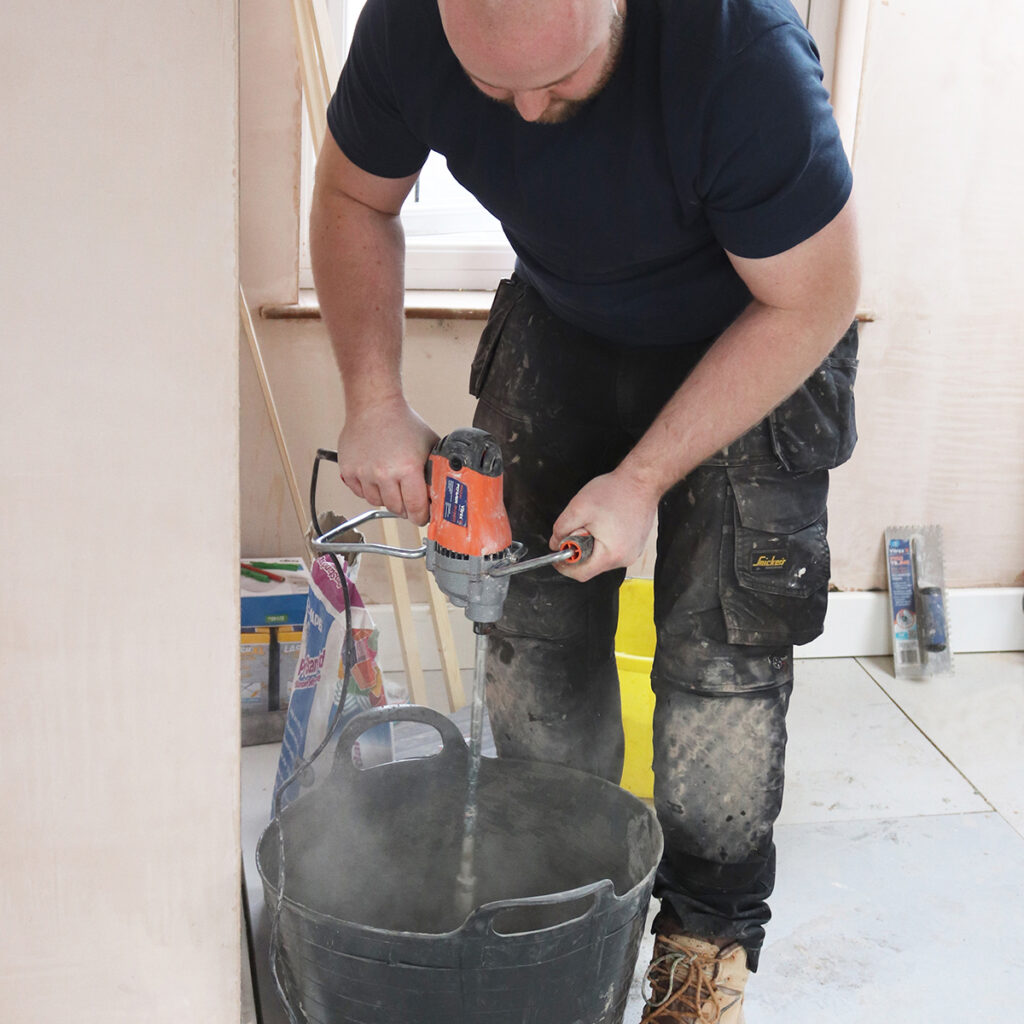
Mix the adhesive prior to placing the tiles on the wall. Follow adhesive instructions.
Floor Tiles
Measure every corner to check that the room is square. In the event the room is not square, you'll need to work out where to put your angled cuts so they are at least noticeable.
If you're tiling a doorway, plan to run the tiling pattern all the way through as it looks far better.
If you have a picture window, archway or other prominent feature, it helps the layout to centre your tiles in this and work outwards.
Cutting
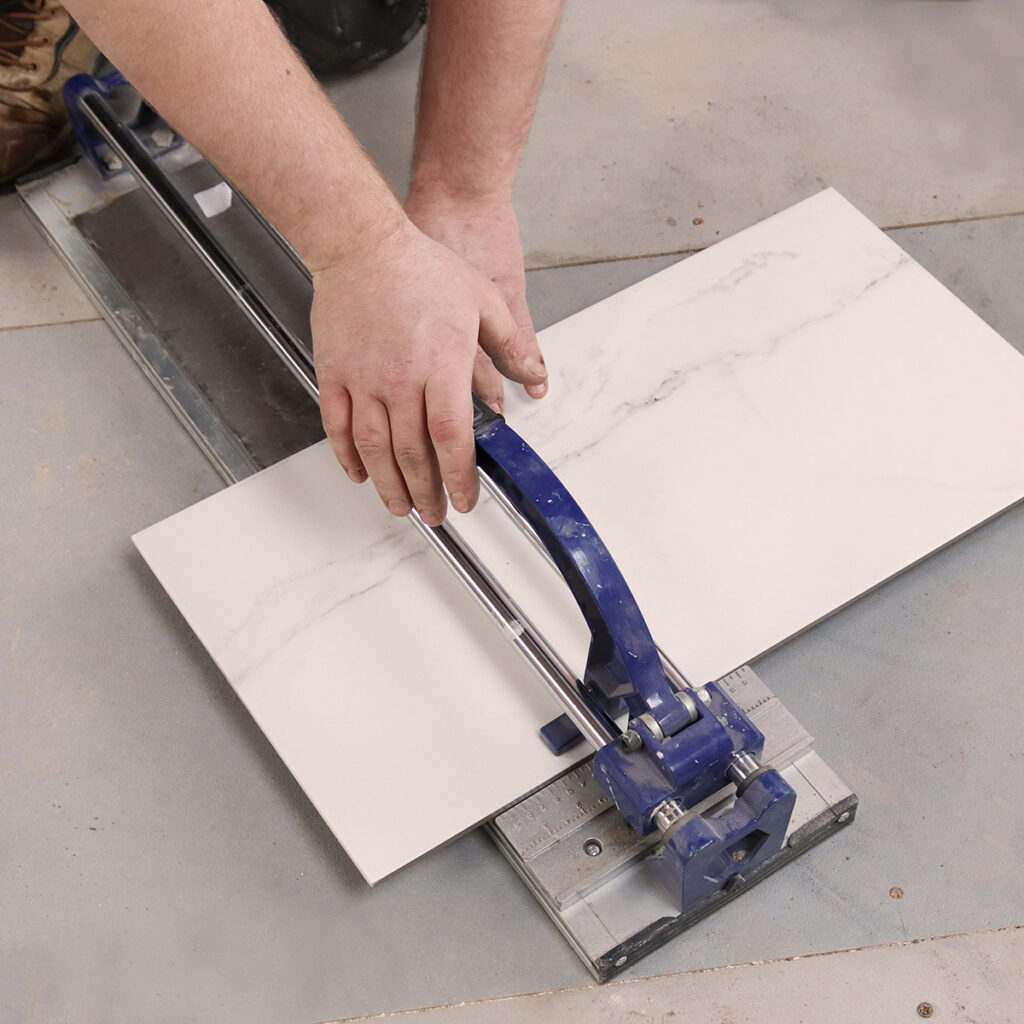
After the tiles have been laid, you will need to cut the remaining tiles to size.
For repetitive straight cuts, it is worth investing in a Vitrex tile cutter.
Shaping
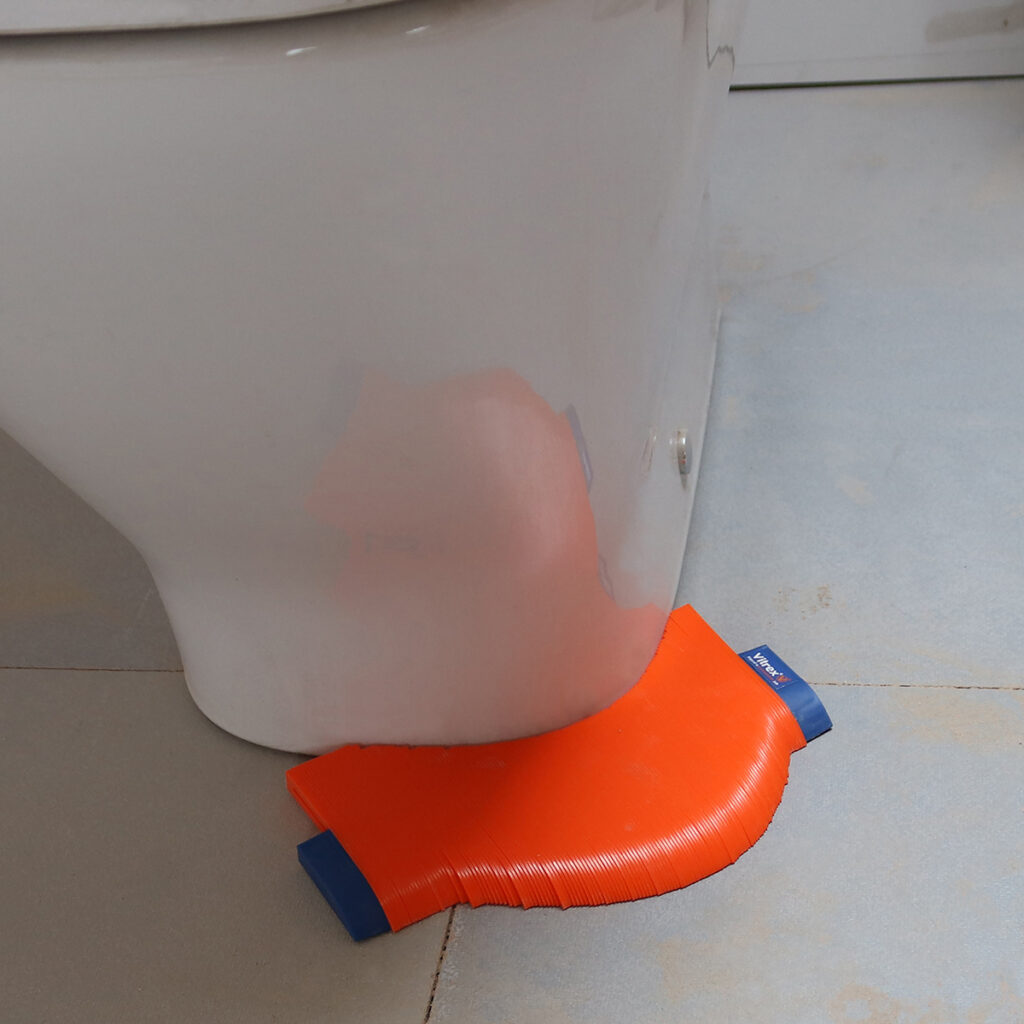
Use a Vitrex profile gauge to fit tiles around shaped areas such as pipes and wash basins.
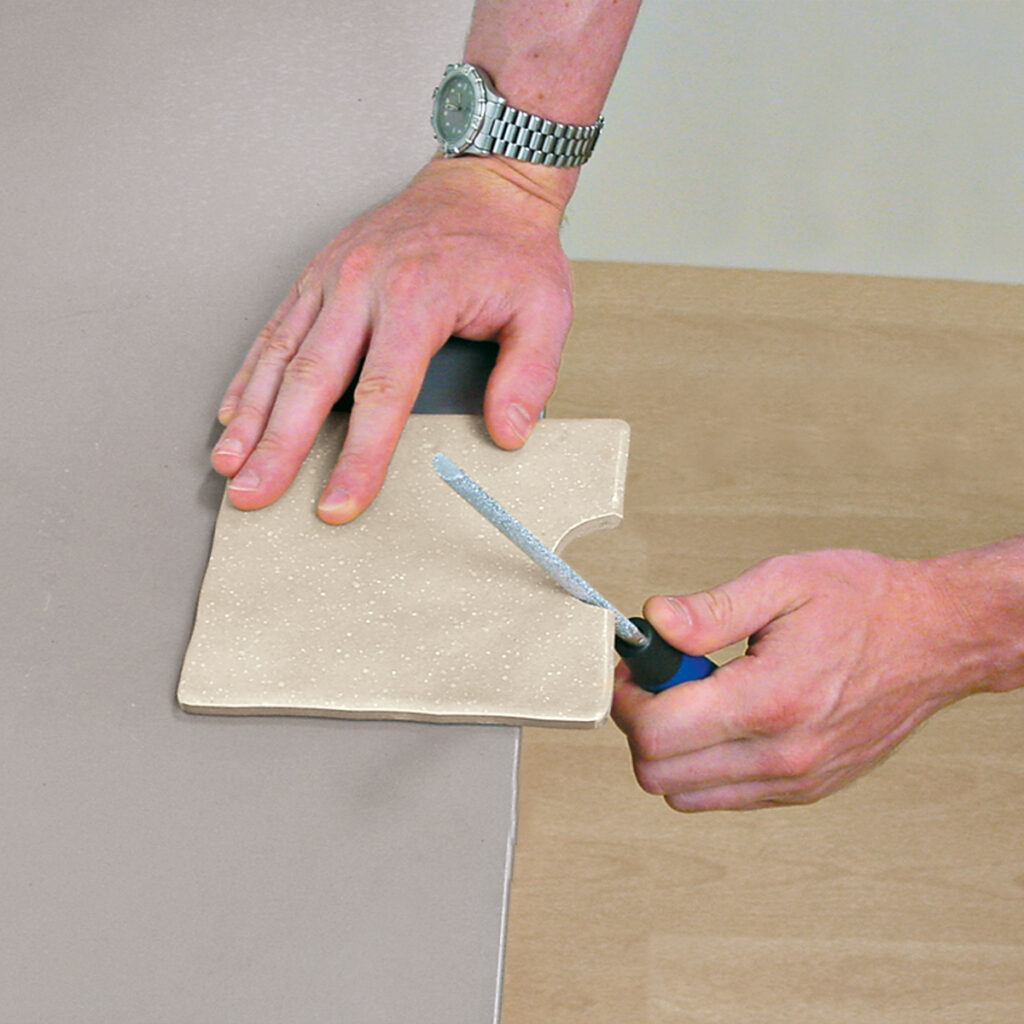
To smooth sharp and uneven edges, use a Vitrex tile file. File away from the glazed edge.
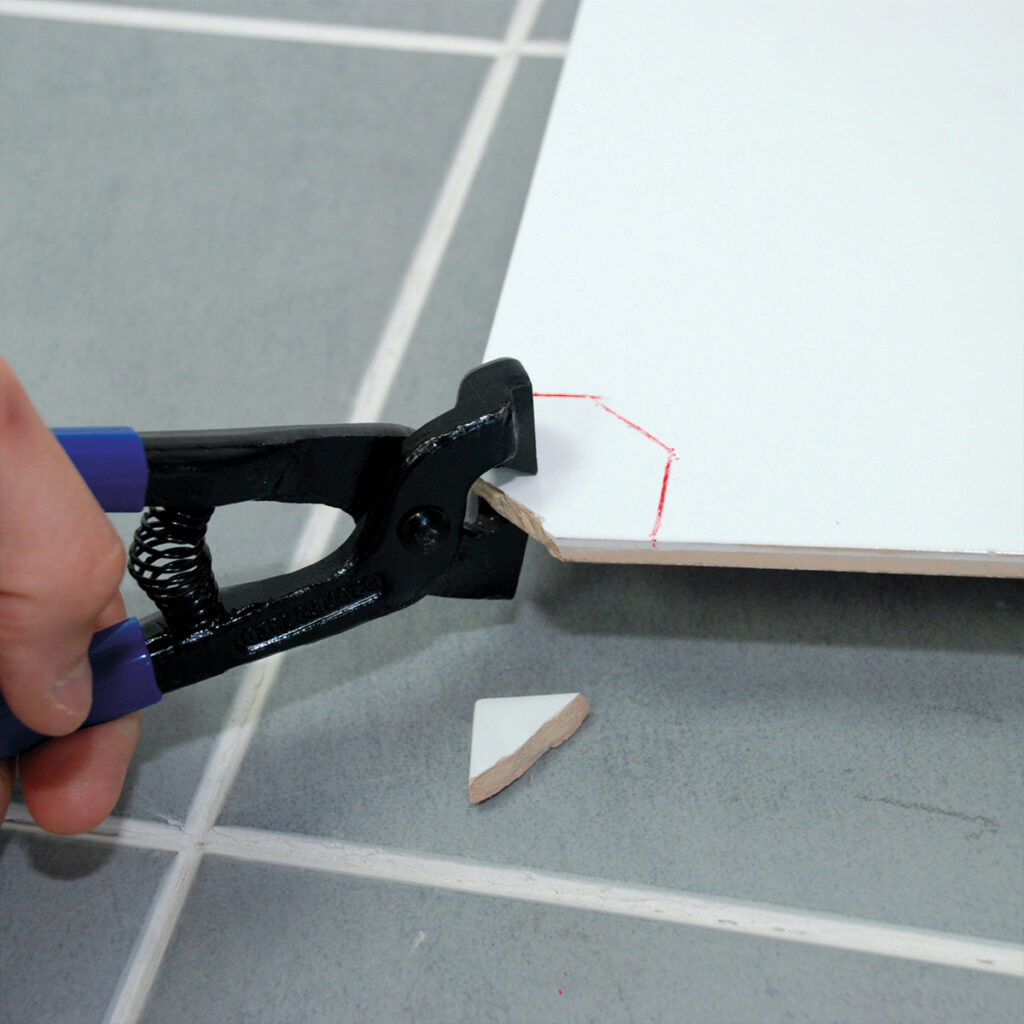
Use a tile nipper to make awkward small cuts or nibbles until the desired shape is achieved.
Fixing
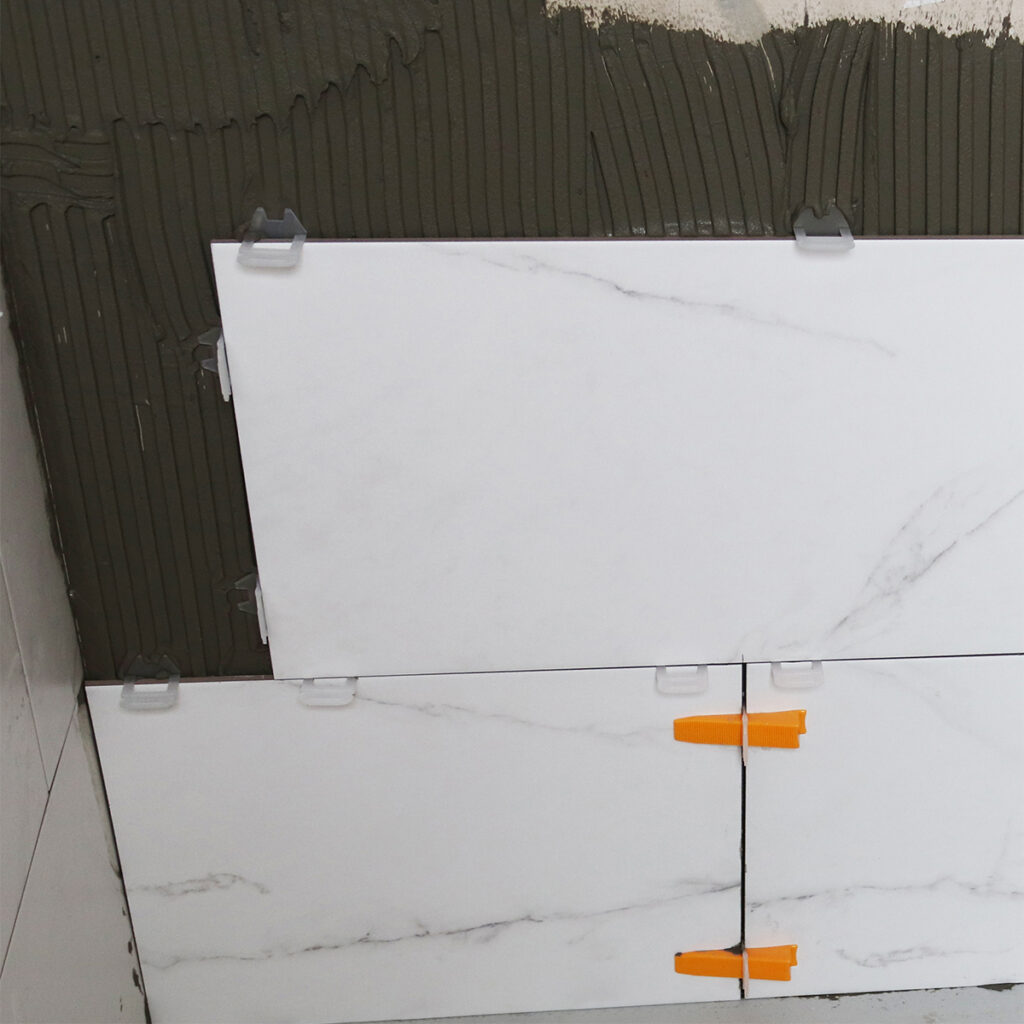
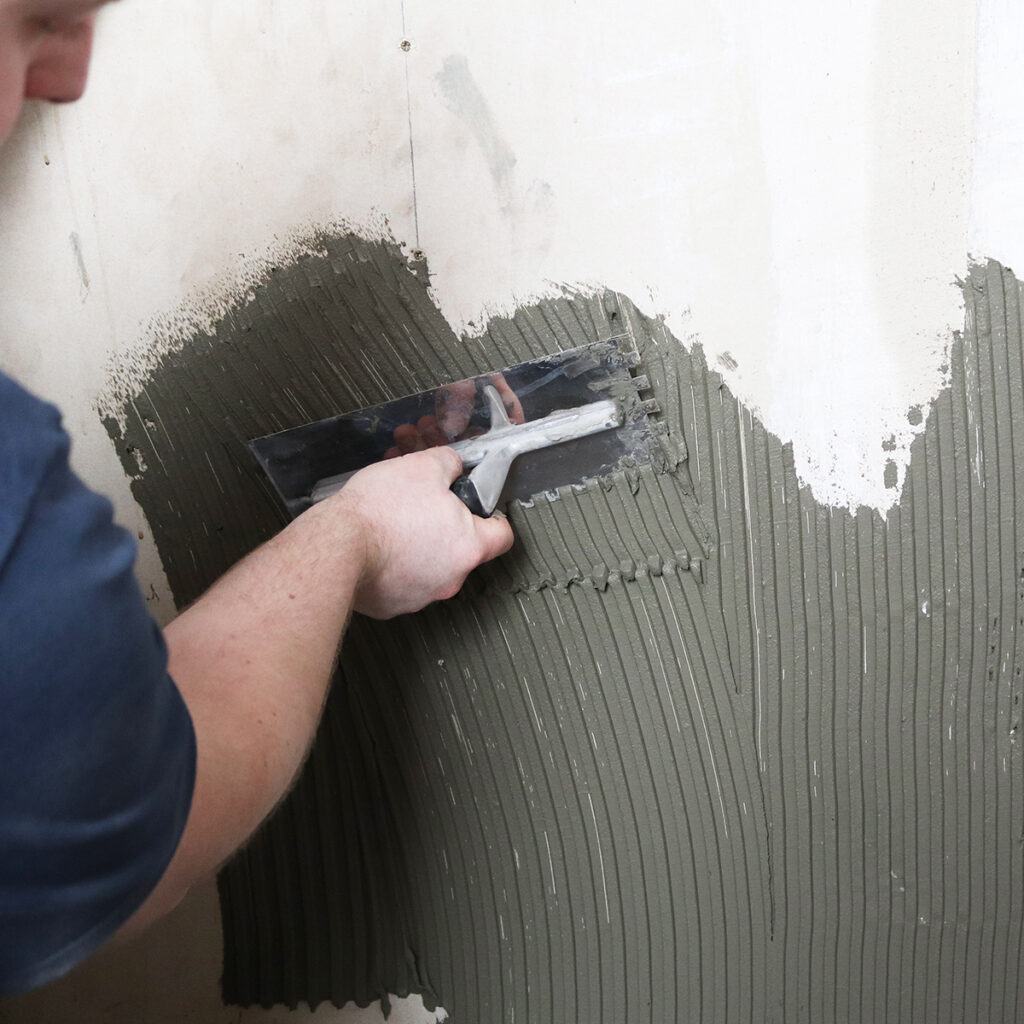
Spread the adhesive according to the manufacturers instructions. Use a Vitrex notched trowel for the best results. Spread about 2 square metres at a time.
Start laying your tiles, adding spacers and wedges or use a choice of Vitrex tile spacers.
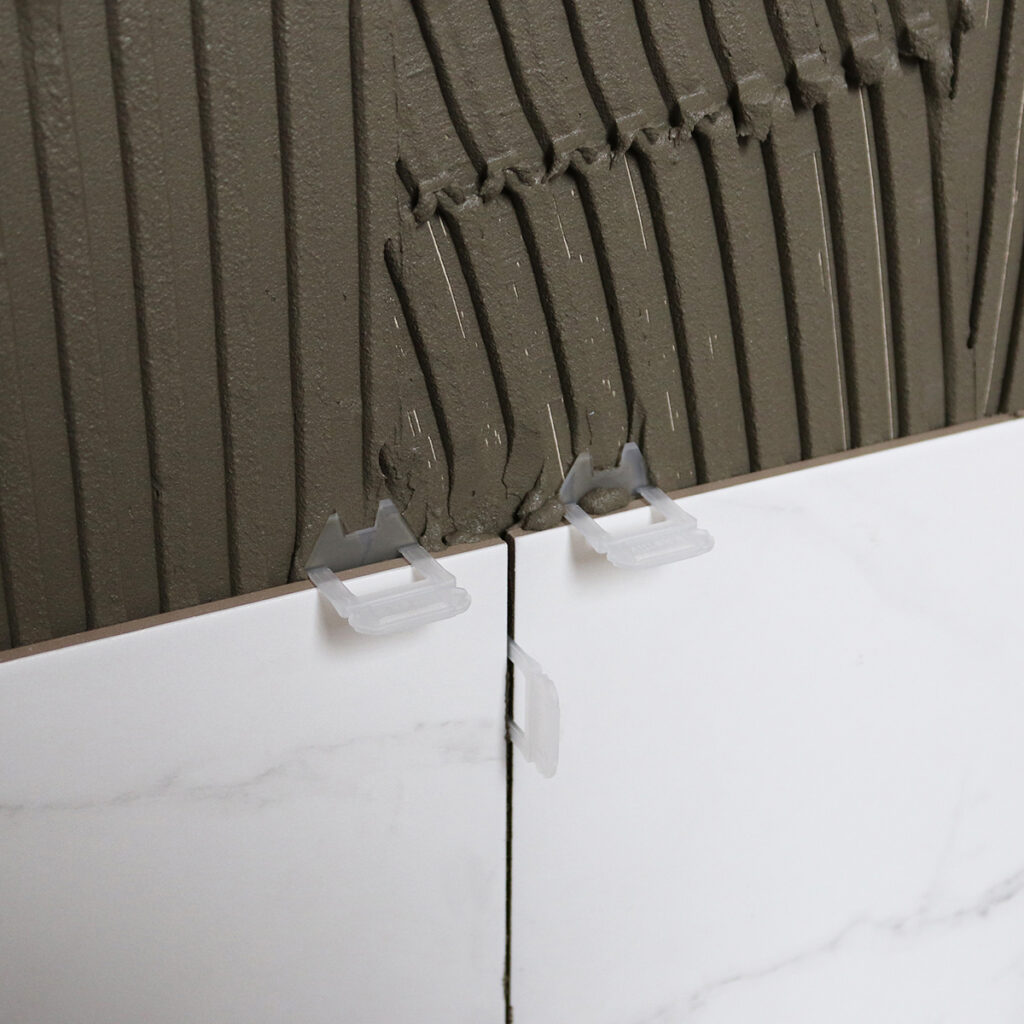
Check with a spirit level that the tiles are square. If using Vitrex LASHXL, use lash pliers to tighten the wedge into the spacer.
Finishing
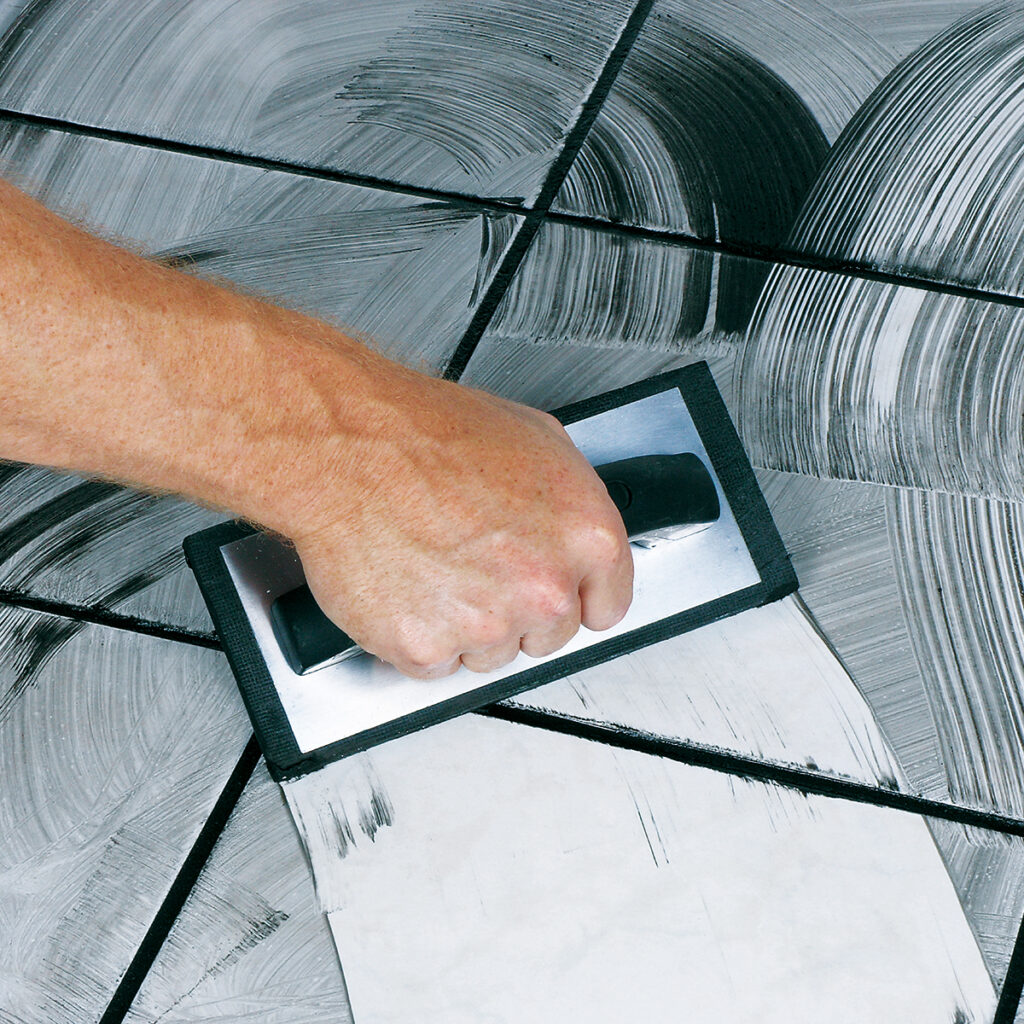
Work the grout in well using a grout float or spreader. Again, cover about a square meter at a time.
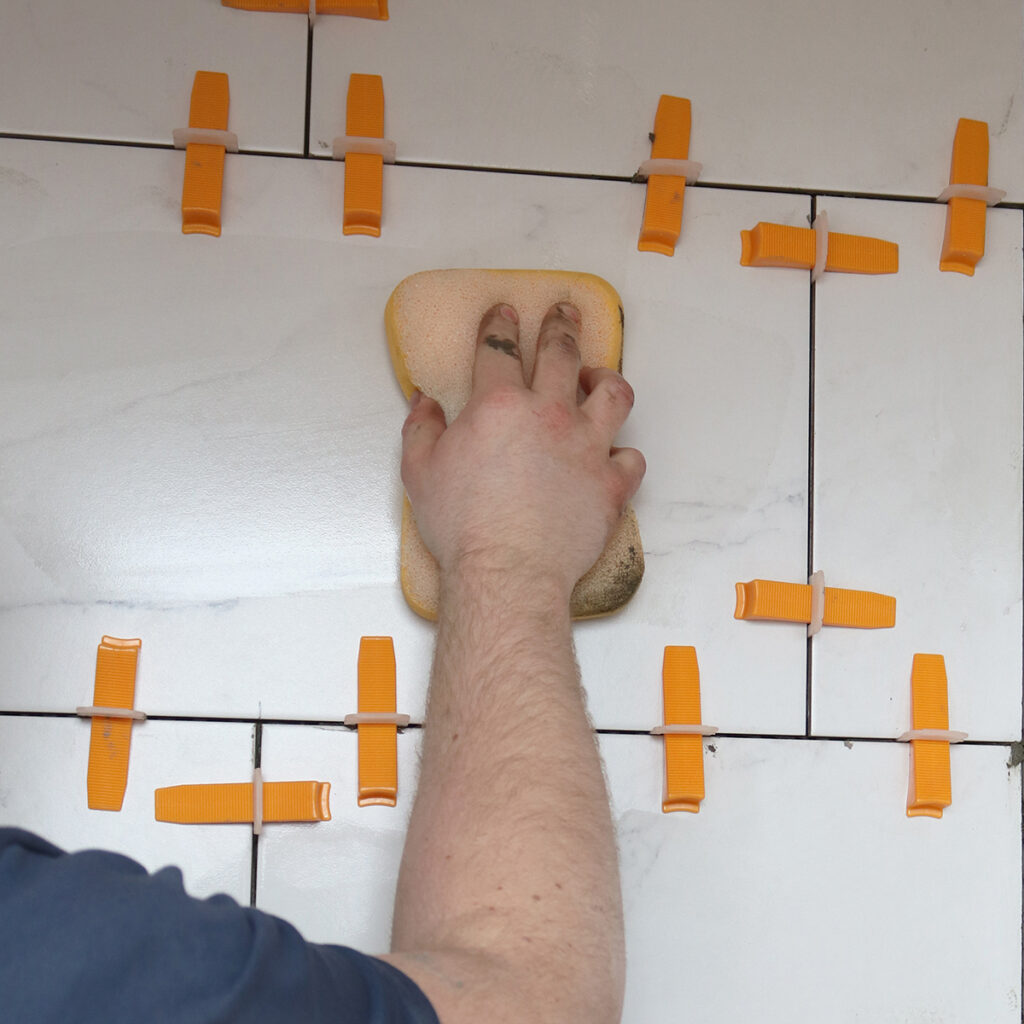
Use a sponge to remove excess grout. When dry, polish it with a soft cloth. A grouting sponge is also perfect for keeping your tiles clean during installation as well as after.
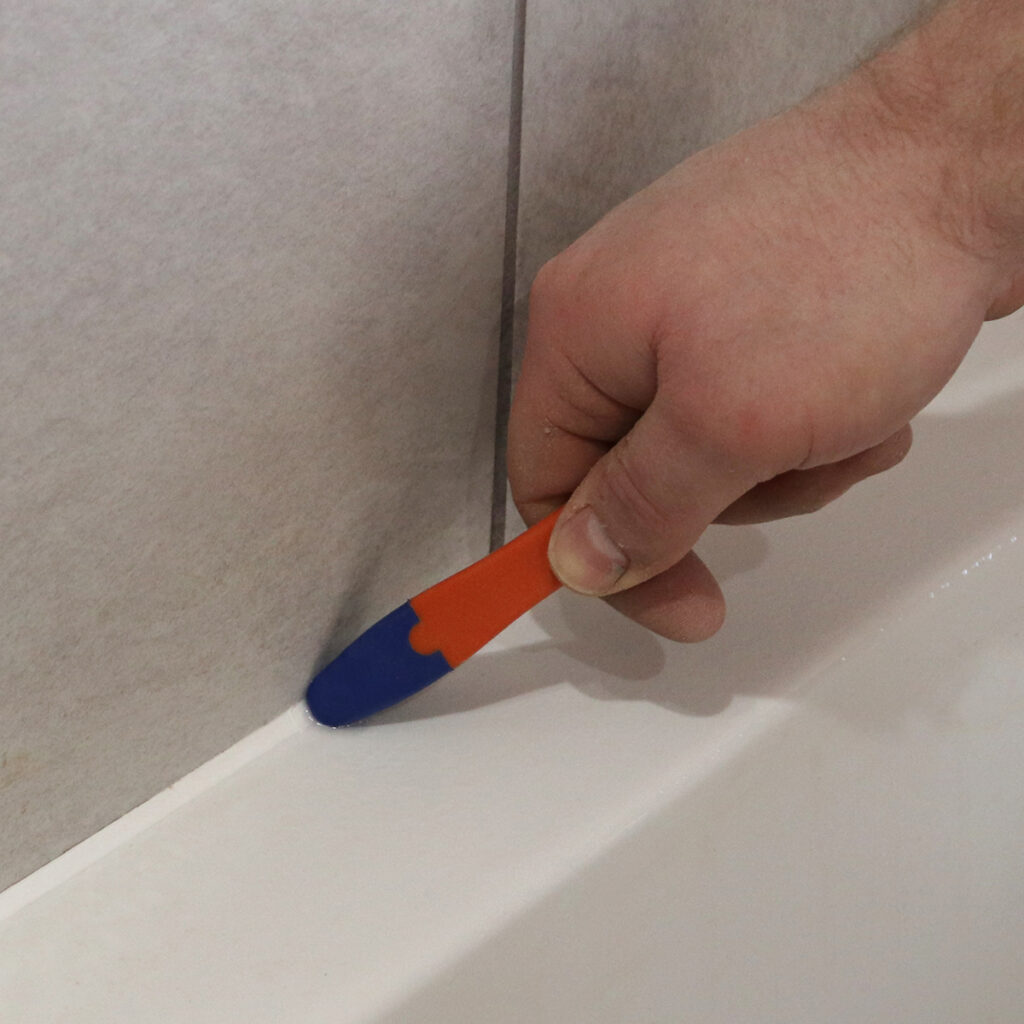
When the tiled surface joins with another surface, apply a sillicone sealant. Use a Vitrex flexi tip sealant smoother for a perfect watertight seal.
Helpful Hints
Always mix the tiles well to avoid uneven colour variation.
When laying tiles on wooden floors, fix marine plasterboard first, but always buy flexible adhesive and grout.
Use a tile shaping template to fit tiles around shaped areas such as pipes & wash basins.
Always select the same width border/trim as your tiles, to keep the grout line consistent.
Use tile drills when drilling holes into tiles. Always cover the area with masking tape first.
Always wear safety goggles when cutting tiles.
Knee pads are essential when laying floors.
We've got everything you need to get started. Shop now!


