Heating & Fuels, Community News
How to Draught Proof Your Home in 6 Easy DIY Steps

Feeling cold air coming through your windows or underneath your doors? Draughts can make your home feel chilly, even when the heating is on. The good news is that draught proofing your home is a simple, affordable DIY project that can help keep warmth inside and cold air out.
Whether you're dealing with draughty windows, gaps beneath doors or a poorly sealed attic hatch, a few small improvements can make your home more comfortable and energy-efficient.
With the right insulation and draught proofing products from Woodie's, many of these jobs can be tackled yourself without expensive renovations.
In this step-by-step guide, we'll show you how to draught proof your home, which products to use, where to look for heat loss and the common mistakes to avoid.
Why Is Draught Proofing Important?
Draught proofing involves sealing unwanted gaps around windows, doors and other areas of your home to reduce the amount of cold air entering and warm air escaping.
Even small gaps can contribute to uncomfortable draughts, particularly during the colder months in Ireland.
Some of the main benefits include:
- Lower heating bills: Reducing unwanted heat loss can help your heating system maintain a comfortable temperature more efficiently.
- A warmer, more comfortable home: Sealing gaps helps prevent cold spots around windows, doors and floors.
- Improved energy efficiency: Keeping heated air inside can reduce the energy needed to warm your home.
- An affordable DIY improvement: Many draught proofing jobs require only basic tools and inexpensive materials.
Draught proofing is particularly useful in older homes, where worn window seals and poorly fitting doors can allow unwanted airflow.
It's also a practical first step towards improving your home's energy efficiency without making major structural changes.
What Do You Need to Draught Proof Your Home?
Before getting started, it's important to choose the right draught proofing products for the areas you want to seal.
Different gaps require different solutions. For example, self-adhesive foam works well around many window frames, while brush strips are better suited to gaps underneath doors.
Here are some useful products available from Woodie's:
| Product | Best used for |
| Self Adhesive Foam 5M Grey | Sealing small 1–4mm gaps around suitable windows and doors |
| P Strip 5m White | Sealing 2–5mm gaps around opening windows and door frames |
| Exitex Draught Proofing Brush Strip 914mm | Reducing draughts beneath doors |
| Exitex Underdoor Foam Draught Excluder 950mm | Sealing gaps underneath internal doors |
| Exitex Automatic Closing Draught Seal 914mm | An automatic seal for suitable inward-opening doors |
| Exitex Letterplate Seal with Flap White | Reducing draughts through horizontal letterboxes |
You may also need a measuring tape, scissors, a cleaning cloth and a suitable flexible sealant for cracks around fixed surfaces.
Explore Woodie's range of insulation and draught proofing supplies to find suitable products for your home.
Top tip: Measure the width and depth of any gaps before buying draught proofing strips. Choosing the correct size will help create an effective seal without making doors or windows difficult to close.
How to Draught Proof Your Home in 6 Easy Steps
Not sure where to begin? Follow these six easy DIY steps to find and seal common sources of draughts around your home.
1. Find Out Where Draughts Are Coming From
The first step in draught proofing your home is identifying where cold air is entering.
On a windy day, hold a small piece of tissue paper near areas where draughts commonly occur.
Check around:
- Window frames and window sills
- External doors and door frames
- Letterboxes and keyholes
- Skirting boards and floor edges
- Attic hatches
- Gaps around pipes entering external walls
If the tissue moves, it may indicate unwanted airflow.
You can also carefully run your hand along window and door frames to check for cold air.
Pay particular attention to older timber windows, external doors and areas where seals have become worn or damaged.
Remember that a cold window pane doesn't necessarily mean there's a draught. Check for actual air movement before choosing a seal.
Top tip: Start with the areas where you can feel the strongest draughts. Tackling these first can make a noticeable difference to your home's comfort.
2. Draught Proof Your Windows
Windows are one of the most common sources of draughts, especially when their seals become worn or small gaps develop around the frames.
Fortunately, learning how to draught proof windows is straightforward, and many repairs can be completed with self-adhesive sealing strips.
How to seal draughty windows
- Clean the window frame: Remove dirt, dust and grease so the adhesive can bond properly.
- Locate and measure the gaps: Check the edges where the opening section of the window meets its frame.
- Choose a suitable draught proofing strip: Select a seal designed for the gap size and window type.
- Cut and apply the strip: Measure the required length and carefully attach it to the appropriate contact surfaces.
- Test the window: Close and reopen it to make sure the seal fits properly without affecting normal operation.
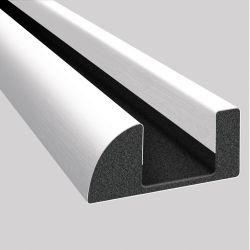
For small gaps, Woodie's Self Adhesive Foam 5M Grey is an easy-to-install option designed to seal gaps between 1mm and 4mm.
If you need a rubber weatherstrip, the E Strip 5m White is suitable for gaps of 2–3.5mm, while the P Strip 5m White is designed for gaps of 2–5mm.
For cracks between a fixed window frame and the surrounding wall, use a suitable flexible sealant rather than draught proofing strips.


Can you insulate windows without replacing them?
Yes. If your windows feel cold even after you've sealed unwanted gaps, an additional glazing film may help improve comfort.
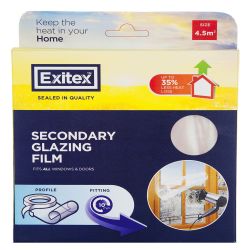
The Exitex Glazing Film 4.5m² Clear creates a secondary glazing effect to help reduce heat loss through the window.
It's a useful additional measure for suitable windows, although it doesn't replace the need to repair damaged frames or seals.
Explore Woodie's insulation and draught proofing range for foam strips, weatherstripping and glazing film.
Top tip: Avoid fitting seals that are too thick, as they can prevent windows from closing correctly. Never cover trickle vents or other purpose-provided ventilation openings.
3. Stop Draughts Coming Through Your Doors
Gaps around external doors can let cold air into your home, particularly during windy weather.
One of the easiest ways to stop draughts coming through a door is to install a suitable draught excluder or door brush strip.
How to draught proof an external door
- Check around the door frame and underneath the door for gaps.
- Measure the width of the door and the clearance underneath it.
- Fit a suitable brush strip or under-door seal.
- Apply weatherstripping around the sides and top of the frame where needed.
- Open and close the door to check the seal works without dragging excessively or preventing proper closure.
For doors with gaps underneath, the Exitex Draught Proofing Brush Strip 914mm is a practical option.
Its durable polypropylene bristles help block draughts and dust, while accommodating irregular gaps and carpeted floors.
For frequently used inward-opening doors, consider the Exitex Automatic Closing Draught Seal 914mm.
This automatic rise-and-fall seal lowers when the door closes and lifts as it opens, allowing the door to move without the seal constantly dragging along the floor. Check the door type and weather exposure before fitting.


How to draught proof internal doors
If you're noticing cold air moving between rooms, draught proofing internal doors can also help improve comfort.
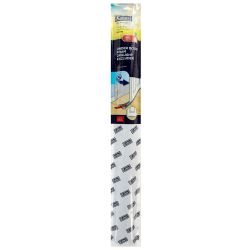
The Exitex Underdoor Foam Draught Excluder 950mm is designed for internal doors and is easy to install.
It can be particularly useful for reducing draughts beneath internal doors where suitable, provided the gap is not required for ventilation.
You can find a selection of suitable door seals, brush strips and draught excluders in Woodie's insulation and draught proofing category.
Top tip: Don't forget to check the letterbox in your front door. Even with a good door seal, an unprotected letterbox can still allow cold air to enter.
4. Seal Gaps Around Skirting Boards and Floors
Windows and doors aren't the only areas where draughts can enter your home.
Small gaps around skirting boards, floor edges and pipe openings can also allow cold air to travel into living spaces.
Here's how to tackle them:
- Inspect skirting boards and floor edges for visible cracks.
- Clean away dust and loose material.
- Apply a suitable flexible decorator's caulk or sealant to small gaps between fixed surfaces.
- Check around pipes passing through walls or floors and use a compatible sealing product where appropriate.
- Allow the sealant to cure according to the manufacturer's instructions.
If you have timber floorboards, choose a gap-sealing product designed to accommodate natural expansion and contraction.
Avoid applying rigid filler to joints that need to move, as it may crack over time.
Top tip: Never block air bricks, ventilation grilles or gaps intentionally provided for ventilation. These openings can be essential for managing moisture and maintaining safe indoor air quality.
5. Draught Proof Your Attic Hatch
Warm air can escape through poorly sealed attic hatches, making them another important area to check when draught proofing your home.
Fortunately, sealing a draughty attic hatch is often a manageable DIY job.
How to draught proof an attic hatch
- Inspect the perimeter of the hatch for visible gaps.
- Clean the hatch frame and contact surfaces.
- Apply a suitable compressible draught proofing strip around the perimeter.
- Close the hatch and check that the strip forms a consistent seal.
- Make sure the hatch remains secure and can still be opened easily.
If the attic hatch itself is uninsulated, consider fitting a suitable insulation material to the hatch, ensuring it won't interfere with safe opening and closing.
Check your attic insulation too
Draught proofing and attic insulation work together to reduce heat loss, but they do different jobs.
While draught proofing seals unwanted air gaps, attic insulation slows heat transfer through your ceiling.
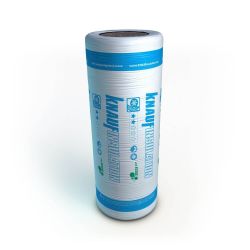
If your existing attic insulation is insufficient, the Knauf Attic Insulation Roll 200mm 5.50m² may be a useful option for improving insulation coverage.
This glass wool insulation roll is lightweight and designed to provide thermal and acoustic insulation.
Before adding insulation, check the existing insulation depth, the appropriate installation method and any electrical or ventilation requirements.
Explore Woodie's range of attic insulation and draught proofing products to help improve your home's energy efficiency.
Top tip: Always maintain ventilation at the attic eaves. Avoid compressing insulation or covering downlights and electrical equipment unless the installation is specifically designed to allow it.
![Knauf Attic Insulation Roll 100mm 11.09 SQ MTR]() Knauf Attic Insulation Roll 100mm 11.09 SQ MTR
- 2 for €100
€54.99€4.96 per sqm- Delivery
- Click & Collect
![Knauf Attic Insulation Roll 200mm 5.50 SQ MTR]() Knauf Attic Insulation Roll 200mm 5.50 SQ MTR
- 2 for €100
€54.99€10.00 per sqm- Delivery
- Click & Collect

6. Seal Letterboxes, Keyholes and Other Small Gaps
Once you've draught proofed your windows, doors and attic hatch, it's time to check the smaller openings around your home.
These finishing touches are easy to overlook but can help reduce unwanted airflow.
How to draught proof a letterbox
Letterboxes can allow cold air to enter whenever the flap isn't fully closed.
A suitable letterbox draught excluder can help create an additional barrier.
The Exitex Letterplate Seal with Flap White features a spring-closing flap and bristles designed to reduce draughts, dust and rain entering through horizontal letterboxes.
It's designed to be fitted to the internal side of a suitable letterbox.
Check keyholes and pipe openings
For additional draught protection:
- Fit a suitable keyhole cover where appropriate.
- Check around fixed pipe openings for gaps that can be safely sealed.
- Inspect door surrounds for worn weatherstripping.
- Replace any damaged or loose draught proofing seals.
When you're finished, repeat the tissue test around the areas you've sealed to check for any remaining draughts.
Top tip: Always use sealing materials compatible with the surface and location. Leave any openings required for ventilation, combustion air or safe appliance operation unobstructed.

Common Draught Proofing Mistakes to Avoid
Draught proofing is a simple DIY job, but a few mistakes can make it less effective. Here's what to watch out for:
- Choosing the wrong products: Use foam or rubber strips for suitable window and door frames, and brush strips for gaps beneath doors.
- Using seals that are too thick: Measure gaps before fitting seals to ensure doors and windows still close properly.
- Skipping surface preparation: Always clean and dry surfaces before applying self-adhesive draught proofing strips.
- Overlooking smaller gaps: Remember to check letterboxes, skirting boards and pipe openings for unwanted draughts.
- Blocking essential ventilation: Never cover air bricks, ventilation grilles or openings needed for fuel-burning appliances.
- Forgetting regular maintenance: Check seals before winter and replace any that are loose, damaged or worn.
Top tip: After fitting your draught proofing products, check for remaining draughts and make sure doors and windows open and close smoothly.
Keep Your Home Warmer with Draught Proofing Supplies from Woodie's
Draught proofing your home is one of the simplest DIY improvements you can make to help reduce unwanted heat loss and create a warmer, more comfortable living space.
From fitting self-adhesive seals around windows to installing door brush strips and insulating your attic, a few small changes can make a noticeable difference during the colder months.
Whether you're tackling one draughty window or preparing your entire home for winter, Woodie's has a range of practical products to help you get started.
Ready to make your home warmer? Explore Woodie's range of insulation and draught proofing supplies and find the right products for your next DIY project.
Frequently Asked Questions About Draught Proofing
What is the best way to draught proof a house?
The best way to draught proof a house is to identify unwanted gaps and seal them using suitable products. Start with draughty windows and external doors, then check skirting boards, attic hatches and letterboxes. Make sure essential ventilation remains unobstructed.
How do you stop draughts coming through windows?
To stop draughts coming through windows, fit suitable self-adhesive foam strips or rubber weatherstripping around opening frames. For cracks between a fixed frame and the surrounding wall, use an appropriate flexible sealant. Damaged or badly warped windows may need professional repairs.
Can you draught proof your home yourself?
Yes. Many common draught proofing jobs, including fitting self-adhesive foam strips, installing door draught excluders and sealing minor cracks, are suitable for DIY. More complex window repairs, structural gaps or ventilation concerns may require professional advice.
Does draught proofing reduce heating bills?
Draught proofing can help reduce heating bills by limiting unwanted heat loss and keeping warm air inside for longer. The amount you save will depend on your home's existing insulation, heating system and the extent of its air leaks.
Is draught proofing the same as insulation?
No. Draught proofing prevents unwanted air from moving through gaps and cracks, while insulation reduces heat transfer through building elements such as walls, roofs and floors. Using both can help improve your home's energy efficiency and comfort.
How often should you replace draught proofing strips?
There's no fixed replacement schedule. Check draught proofing strips regularly, particularly before winter. Replace them if they become loose, damaged, compressed or no longer form an effective seal.

Keegan Da Costa
Working with your hands is one of the most rewarding ways to improve your home, and for me, that comes through woodworking, DIY, and gardening. I’ve always been drawn to carpentry, especially the process of turning raw materials into something practical, durable, and well-crafted. Whether it’s building furniture or taking on smaller projects around the house, I value precision and doing things properly. Gardening brings the same satisfaction in a different way. From planning layouts to growing and shaping outdoor spaces, it’s about creating environments that feel natural, balanced, and inviting. At their core, DIY and gardening are about the same thing: improving your space through a hands-on, thoughtful approach that delivers lasting results.