How to Build a Raised Garden Bed: A Step-by-Step Guide

Written by Brian Burke, Woodies' resident gardening expert, RTÉ Super Garden judge, and award-winning garden designer.
A raised garden bed is one of the easiest and most effective ways to add height, structure, and growing space to your garden. Whether you want to grow colourful flowers, fresh herbs, vegetables, or seasonal plants, a raised bed can help create a neat, practical area that’s easy to plant, care for, and enjoy.
Raised beds are also a great option if you want to make the most of a small garden, improve poor soil, or create more defined areas in your outdoor space. With the right materials and a little preparation, you don’t need to be an expert gardener or a skilled block layer to get started.
After a long winter, many of us are ready to get back outside and start tackling garden jobs. Building or refreshing a raised garden bed is a great place to begin.
Here’s our complete guide to building a raised garden bed at home.
Why Build a Raised Garden Bed?
Raised garden beds are a brilliant way to make your outdoor space more practical and organised. They introduce height into the garden, help define planting areas, and can create a smart feature in patios, lawns, or larger garden spaces.
Because the growing area sits above ground level, raised beds can also make everyday gardening jobs easier. Planting, weeding, watering, feeding, and harvesting can all feel more manageable when the bed is raised.
Raised beds also give you more control over the soil you use. This is especially helpful if your garden soil is heavy or difficult to work with. Instead of relying only on the soil already in your garden, you can fill your raised bed with a mix of compost, topsoil, and organic matter to create better growing conditions from the start.
What Can You Grow in a Raised Garden Bed?
Raised beds are very versatile, so you can use them for lots of different plants depending on the season, location, and amount of sunlight available.
Popular options include:
- Herbs
- Salad leaves
- Carrots
- Beetroot
- Radishes
- Tomatoes
- Courgettes
- Beans
- Strawberries
- Seasonal flowers
- Pollinator-friendly plants
If you’re growing vegetables, herbs, or flowering plants, choose a bright, sheltered spot where your plants will get plenty of sunlight. Try not to overcrowd the bed, as plants need enough space for their roots to grow and for air to move around the leaves.
What Can You Use to Build a Raised Garden Bed?
There are a few different ways to build a raised garden bed. Timber raised bed kits are a popular choice, especially for simple vegetable or herb beds. Walling blocks are another great option if you want a strong, long-lasting raised planter with a more structured finish.
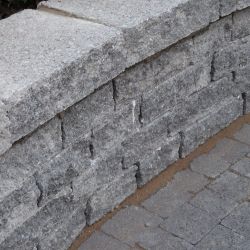
For a sturdy DIY option, we recommend Connemara Decorative walling. This pre-cast walling product can be used for raised planters, retaining walls, and small garden structures. It’s a practical choice for confident DIYers because it is designed to be easy to lay, without needing traditional block-laying skills.
The key is to prepare a solid base, get the first course right, and secure each following course with a suitable adhesive, such as Tech 7 or a similar product.
When Is the Best Time to Build a Raised Garden Bed?
Spring is a great time to build a raised garden bed, especially if you want to prepare your garden for the growing season. After winter, garden beds can often need a little attention before they’re ready for planting.
You can also build a raised bed in autumn or winter, as long as the ground conditions are suitable. This gives you time to build the structure, fill it, allow the soil to settle, and have everything ready for planting when the weather warms up.
If you already have a raised bed, spring is the perfect time to clear it, cultivate the soil, add fresh compost, and get it ready for new plants.
What You’ll Need to Build a Raised Garden Bed
What you need will depend on the type of raised garden bed you’re building, but useful tools and materials may include:
- Walling blocks, timber, or a raised bed kit
- Hardcore or a suitable base material
- A level
- Measuring tape
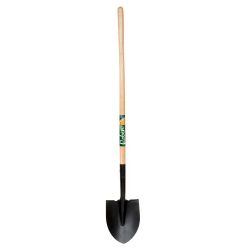
- A trowel or shovel
- Gardening gloves
- A suitable adhesive, such as Tech 7, if using walling blocks
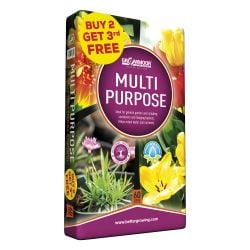
- Compost
- Topsoil or raised bed mix
- Soil improver or organic matter
- Plant feed
- Mulch
- Seeds or starter plants
Before you begin, measure the area carefully and make sure you have enough material for the size and height of the raised bed you want to build.
How to Build a Raised Garden Bed
1. Choose the Right Spot
Start by choosing where your raised garden bed will go. Most plants grow best in a bright, sheltered position, so think about how much sunlight the area gets throughout the day.
If you plan to grow vegetables, herbs, or flowers, a sunny spot will usually give the best results. It’s also worth choosing somewhere easy to access, so watering, feeding, weeding, and harvesting are straightforward.
Avoid placing your raised bed somewhere that becomes waterlogged or is difficult to reach with a watering can or hose.
2. Decide on the Size and Shape
Next, decide how large you want your raised bed to be. It should be big enough for the plants you want to grow, but not so wide that you struggle to reach the middle.
If the bed can be accessed from both sides, you’ll have more flexibility with width. If it sits against a wall or fence, keep it narrow enough that you can comfortably reach the back.
Think about the overall look of your garden too. A raised planter can be used to add height, frame a seating area, divide a space, or create a neat planting feature.
3. Prepare a Solid, Level Base
A strong raised garden bed starts with a stable base. If you’re building with walling blocks, the structure can be built on a poured slab or on a base of compacted hardcore.
The base should be firm, level, and able to support the weight of the raised planter once it is filled with soil and compost.
Take your time with this stage. A level base will make the rest of the build much easier and will help keep the finished raised bed secure.
4. Lay the First Course or Build the Frame
If you’re using walling blocks, lay the first course carefully and check that it is level. This bottom course is one of the most important parts of the build, as it sets the shape, line, and stability for the rest of the raised planter.
If you’re using timber or a raised bed kit, assemble the frame according to the instructions and make sure each corner is secure.
Check your measurements as you go and make sure the structure sits evenly before building upwards.
5. Secure Each Layer
Once the first course or frame is in place, continue building up the raised bed to your chosen height.
If you’re using Connemmara walling or a similar pre-cast walling product, apply a suitable adhesive between each course. A strong adhesive such as Tech 7, or a similar product, can help secure each layer without the need for traditional block laying.
Follow the adhesive instructions carefully and allow the structure to set properly before filling the bed.
6. Check the Structure Is Stable
Before adding soil, check that the raised bed feels strong, level, and secure. Look for uneven sections, loose areas, or gaps that may need adjusting.
It’s much easier to fix these issues before the bed is filled, so don’t rush this step.
Once the structure is stable, your raised garden bed is ready to be filled.
7. Fill the Raised Bed
Fill your raised bed with a mix of good-quality compost, topsoil, and organic matter. This helps create a healthy growing environment with the nutrients and structure your plants need.
Raised beds can take a lot of material to fill, so add it in layers and firm it gently as you go. Avoid pressing it down too much, as plants need loose, well-aerated soil for healthy root growth.
Leave a little space below the top edge of the bed so compost and water don’t spill over when watering.
How to Prepare the Soil for Planting
Once your raised bed is built and filled, the next step is preparing the soil. Before planting, one of the most important jobs is cultivating, aerating, turning over, and digging the soil in any bed you plan to plant in.
This helps refresh the soil after winter, break up compacted areas, and create better conditions for new roots.
1. Cultivate and Aerate the Soil
Use a garden fork or hand fork to gently loosen the top layer of soil. This helps air, water, and nutrients move through the bed more easily.
You don’t need to dig too deeply, but turning over the top layer and breaking up compacted soil can make a big difference before planting.
If you’re working with an existing raised bed, remove any old roots, weeds, or leftover plant material before you begin.
2. Add Soil Improver or Organic Matter
After loosening the soil, add soil improver, garden compost, or well-rotted organic matter. This helps boost nutrients and improves the structure of the soil.
Mix it gently into the top layer or spread it across the surface and allow it to settle in naturally.
This step is especially useful if you plan to grow vegetables, fruiting plants, or flowers that need plenty of nutrients throughout the season.
3. Add Plant Feed If Needed
Depending on what you’re growing, you may want to add a suitable plant feed before planting. This can help give new plants a strong start and support healthy growth.
Always follow the instructions on your chosen feed, as different plants have different needs.
Planting Your Raised Garden Bed
Once the bed is built, filled, cultivated, and treated, it’s ready to plant. If you can, it’s a good idea to plant straight away and make the most of the freshly prepared soil.
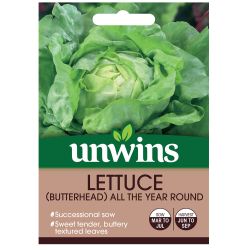
You can sow seeds directly into the bed or plant young starter plants, depending on the season and what you want to grow.
Use a trowel to create planting holes, firm the soil gently around each plant, and water well. If you’re sowing seeds, follow the spacing and depth instructions on the packet.
Top tip: use plant labels so you remember what you’ve planted and where.
What If You’re Not Ready to Plant Yet?
If your raised bed is prepared but you’re not ready to plant straight away, add a layer of organic mulch over the soil.
Mulch helps suppress weeds, retain moisture, and protect the soil surface until you’re ready to start planting. This is a simple way to keep your bed tidy and stop weeds from taking over while you wait.
You can use bark, compost, straw, or another suitable mulch depending on what you plan to grow.
How to Care for Your Raised Garden Bed
Once planted, your raised bed will need regular care to keep it healthy and productive.
Water consistently, especially during warm or dry weather. Raised beds can drain more quickly than ground-level beds, so check the soil regularly and water when the top layer feels dry.
Remove weeds while they’re small, as they’re easier to manage. If you’re growing vegetables or fruiting plants, feed them as needed during the growing season.
Keep an eye on plant spacing as everything grows, and harvest crops regularly to encourage more growth.

Raised Garden Bed Tips
To get the best results from your raised garden bed:
- Choose a bright, accessible spot
- Make sure the base is firm and level
- Get the first course or frame right before building up
- Use a suitable adhesive if building with walling blocks
- Check the structure is stable before filling
- Fill with good-quality compost, topsoil, and organic matter
- Cultivate and aerate the soil before planting
- Plant as soon as the bed is ready if you can
- Add mulch if you’re not planting straight away
- Water regularly during dry weather
Start Building Your Raised Garden Bed Today with Woodies
Building a raised garden bed is a simple and rewarding way to make your garden more useful, organised, and enjoyable. Whether you want to grow vegetables, herbs, flowers, or a mix of everything, a raised bed gives you a dedicated space to plant and care for your garden throughout the season.
A raised planter can also bring height and structure into your outdoor space, helping to create a garden that feels more finished and easier to manage. With materials such as Connemara walling, you can create a sturdy DIY planter that works well for planting, retaining walls, or small garden features.
Once your raised bed is built, take the time to cultivate, aerate, and prepare the soil before planting. If you’re ready to plant straight away, you can make the most of the freshly prepared bed. If not, a layer of organic mulch will help suppress weeds and protect the soil until you’re ready.
When you’re ready to begin, you’ll find everything you need to build and plant your raised garden bed at Woodie’s. For more seasonal gardening tips, planting inspiration, and step-by-step advice, explore more ideas and advice on our blog.
FAQs - Raised Garden Beds
Is it easy to build a raised garden bed?
Yes, building a raised garden bed can be a manageable DIY project with the right tools, materials, and preparation. The key is to choose a suitable spot, prepare a level base, and make sure the structure is secure before filling it.
What is the best material for a raised garden bed?
Raised beds can be made from timber, raised bed kits, or walling blocks. Walling blocks such as Colomar walling are a good option if you want a strong, structured raised planter that can add height and shape to the garden.
Do I need to be a skilled block layer to build a raised planter?
Not necessarily. Some pre-cast walling products are suitable for confident DIYers and are designed to be easy to lay. The most important steps are preparing a solid base, getting the first course level, and using a suitable adhesive between courses.
Do I need a base for a raised garden bed?
A stable base is important, especially if you’re building with walling blocks. A poured slab or compacted hardcore base can help create a firm, level foundation for the raised planter.
What should I fill a raised garden bed with?
Fill a raised garden bed with a mix of good-quality compost, topsoil, and organic matter. This helps create a healthy growing environment with nutrients, drainage, and structure.
Should I aerate the soil before planting?
Yes, aerating the soil before planting helps loosen compacted areas and allows air, water, and nutrients to move through the bed more easily. This can help support healthier root growth.
What should I do if I’m not ready to plant yet?
If your raised bed is ready but you’re not planting straight away, add a layer of organic mulch. This can help suppress weeds, hold moisture, and protect the soil surface.
Can I grow vegetables in a raised garden bed?
Yes, raised beds are ideal for growing vegetables. Salad leaves, herbs, carrots, beetroot, tomatoes, beans, courgettes, and strawberries can all grow well in raised beds with the right care.
When is the best time to build a raised garden bed?
Spring is a great time to build a raised garden bed if you want to plant for the growing season. You can also build one in autumn or winter, as long as the ground conditions are suitable.

Brian Burke
Brian Burke is a landscape contractor and award-winning garden designer. He is the resident gardening expert with Woodie’s and a judge on RTÉ’s Super Garden. He attained his B.Sc. Hons. from Trinity College Dublin in 1994 and has over 20 years’ experience in the construction and landscaping business in Ireland, the UK and the US. Brian won Super Garden in 2015 and was awarded a silver-gilt medal for his garden, Non Forsit, at Bord Bia Bloom 2015. He has since gone on to design and build several award-winning show gardens in 2016, 2017, 2018, and 2019, winning silver and gold medals.