A Step-by-Step Guide on How to Paint a Ceiling

Are you ready to cover up flaws in your ceiling? Or are you wanting a fresh, new look in a certain room?
Then, it’s time to consider painting.
When it comes to how to paint a ceiling, you need to plan before you start. There are plenty of materials you’ll need. Plus, you’ll need to have a game plan on how to work around the room you’re painting. Always plan it systematically so you don’t miss any bits that will show up when the paint is dry.
Here’s a step-by-step guide on how to paint a ceiling like a pro.
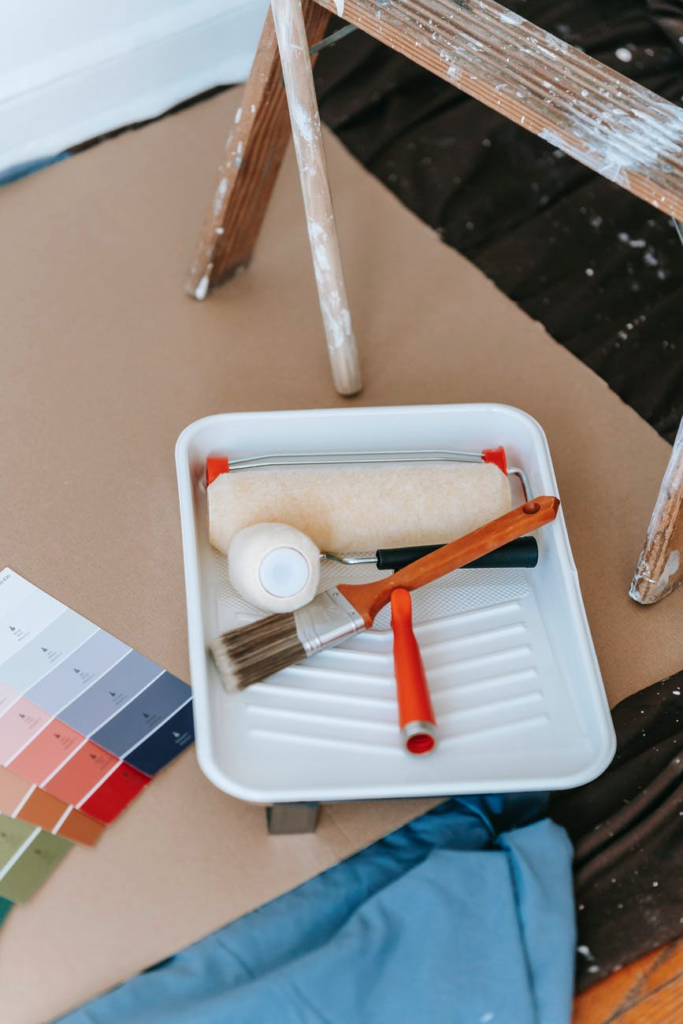
Tools for the Job:
First things first, you’ll need to gather up your materials. Here’s what you’ll need to get the job done:
- Ceiling paint/matt emulsion
- Dust sheets
- Paint roller with extension handle
- Paint sprayer (optional)
- Paint tray
- Paintbrush
- Step ladder
- Paint kettle
- Paint scraper (if required)
- Masking tape (if required)
- Putty knife (if required)
- Drywall mud or spackling compound (if required)
- Cardboard (if required)
How to Prep Your Ceiling
Like with any paint job, you need to prep your ceiling before you start painting. Don’t skip this part because preparing your ceiling’s surface is the only way to make sure you get a nice, even coat on it.
Here’s how to prep your ceiling:
How to Fix Cracks in the Ceiling Before Painting
Fixing cracks in the ceiling before painting is a small job in and of itself. But, fortunately, it’s very easy to do!
Step 1: Scrape away loose paint.
Use a screwdriver to remove loose paint and any plaster pieces out of the cracks. If you have a plaster ceiling, using the screwdriver, make the cracks just slightly bigger. That way, they’ll hold an appropriate amount of patching compound. If you have a drywall ceiling, you don’t need to enlarge the cracks.
Step 2: Sand over the cracks.
Sand over the cracks with 100-grit sandpaper. Smoothing the edges of chipped paint allows the new ceiling paint to adhere better. Then, vacuum away dust from the sanding.
Step 3: Apply your patching compound.
The best filler for these cracks depends on the material of your ceiling. If you have a plaster ceiling, use spackling compound or another plaster-repair compound. If you’re fixing cracks in a drywall ceiling, use drywall mud. Smooth it over the cracks with a putty knife. Check the manufacturer’s instructions, and let it dry for the appropriate amount of time. Then, sand the compound with 200-grit sandpaper.
Step 4: Apply your second layer of compound.
A second coat makes sure the cracks are filled before you paint the ceiling. Then, just sand and vacuum again. You’re ready to paint your ceiling!
How to Remove Paint from Ceiling
When it comes to how to paint a ceiling that already has paint on it, the solution is simple. Just paint over it!
But if you’ve accidentally made a mistake while painting your ceiling and need to remove it another way, here’s how:
Use a heavy-duty wipe
If it’s still wet, you can remove a splotch of paint with a wet cloth.
If the paint is already dry, use a heavy-duty cleaning wipe to remove the spot.
Use a paint scraper
You can also try using a paint scraper to remove paint from the ceiling. First, use a paint remover solution and spray the area you need to remove. Allow the solution to sit for a moment so the paint absorbs it. Then, use a scraper to gently remove the paint.
Top Tip: Be sure to wear goggles and a dust mask to prevent inhalation or getting any paint or solution in your eyes.
Cover Areas You Don’t Want to be Painted
Apply masking tape to any skirting or architraves that you don’t want to paint over. Remove any light fittings if possible. If you can’t, cover them with masking tape.
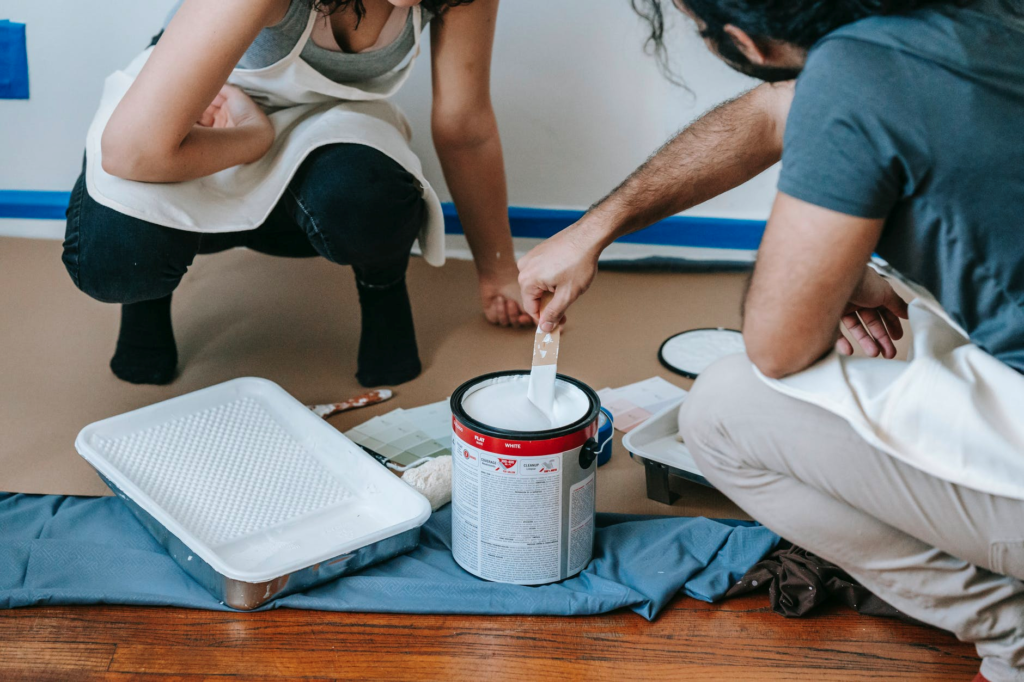
Step 1: Use standard matt emulsion paint
When painting a ceiling you can simply use a standard matt emulsion paint. Generally, white is chosen, but you can choose any colour. For added convenience, choose ceiling-specific paint. It has a high gel formulation that is easy to apply and provides less drip and splatter.
Usually, you’ll need two coats. But read the manufacturer’s instructions before starting.
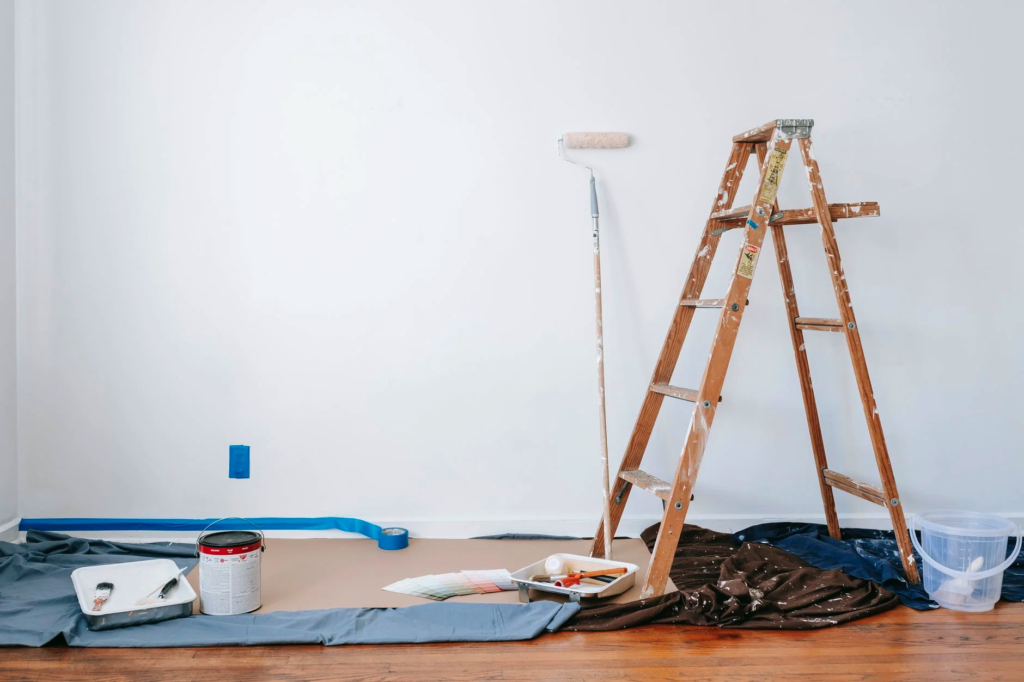
Step 2: Clear the room out as much as possible
Before you apply any paint, you need to have the room as clear as possible. Push any furniture to the centre of the room. Cover it with dust sheets so everything’s protected. Flooring also needs to be protected with dust sheets. Think about how you are going to reach the surface safely and comfortably. Use a suitable step ladder or an extension handle to do this!
Step 3: Start painting around the edges
When it comes to painting a ceiling, you want to start by painting around the edges. If you have coving, paint that too. Begin in one corner and work your way around the room.
A paint kettle is great for bringing up a more manageable amount of paint for doing the brushwork. Since you will paint the walls next, apply the ceiling paint down about 2cm onto the wall with the first coat. That way, when you apply the wall paint later, you only have to “cut in” to the ceiling line with the wall colour. This makes it much easier to get a neat line.
Top Tip: Dampen the roller with some water before starting. The roller will pick up the paint better when it’s slightly damp.
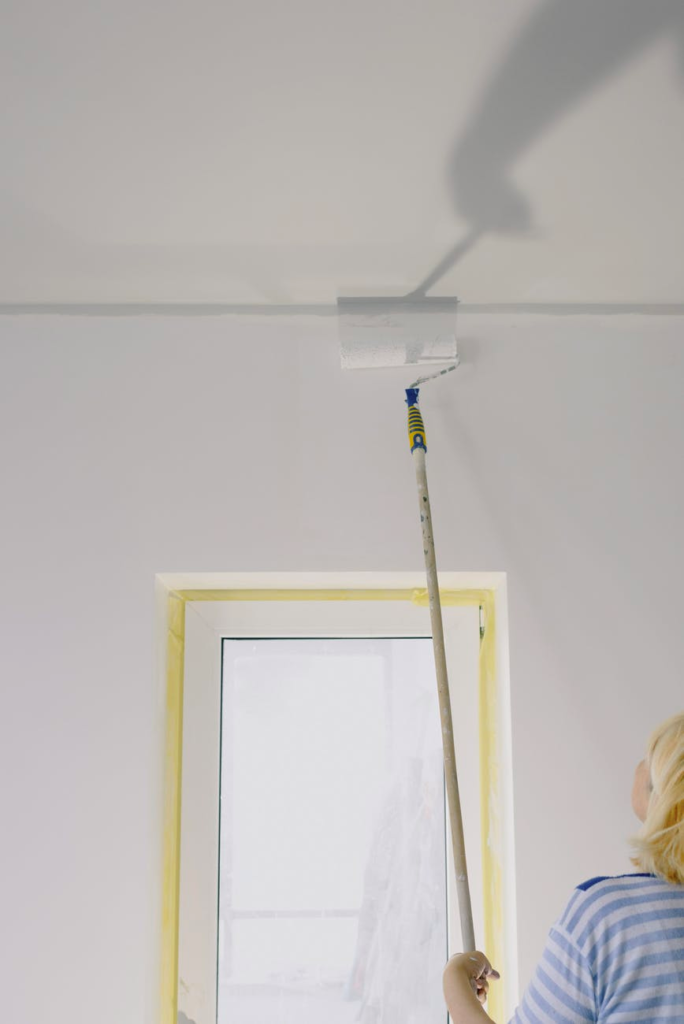
Step 4: Paint the ceiling with a roller
After cutting in, paint the rest of the ceiling using a paint roller. If your ceiling is stippled, use a long pile roller. If it’s smooth plaster, use a short pile roller. When rolling, make sure it’s fully loaded with paint.
Roll the paint on gently. Use long even strokes and then go off gently.
Step 6: Apply your second coat of paint
Leave the paint to dry before applying a second coat (if it’s required).
Top Tip: If you have to leave it to dry overnight, wrap brushes and rollers in plastic bags or tin foil. They can be re-used without cleaning!
Step 7: Paint the ceiling trim
Once the walls are completely dry, use masking tape along the wall-trim edge. Use a putty knife to make sure it’s effectively applied. Using your paintbrush, paint the trim with the ceiling paint.
Top Tip: After painting, remove the tape. Don’t wait for the paint to dry completely since you don’t want the paint to peel.
What to Remember When Painting Your Ceiling
Before you get started, keep these key things in mind. These will make sure your ceiling painting experience runs smoothly.
Is Ceiling Paint Different from Wall Paint?
Ceiling paint is different from regular wall paint. Ceiling paint is thicker and, for the most part, it’s latex-based and designed to have a smooth finish that’s easily applied. Usually, you’ll find them in a matte or a low-gloss sheen.
Can You Paint Walls and Ceiling the Same Colour?
From a technical perspective, you can paint walls and ceilings the same colour! And it’s much easier to paint them the same colour since the colours are already matched for you.
However, from a design standpoint, you may want to consider your options, first. You can choose paint colours to evoke a specific mood and aesthetic for your home. That said, if you’re using white for both your walls and your ceiling, your room will look cleaner and often, bigger.
Should You Paint the Ceiling First?
Yes. Usually, when it comes to painting any room, you should start with the ceiling first. Then finish off with timber architrave and skirting.
How to Paint a Ceiling with a Roller?
At Woodie’s, this is our recommended method when it comes to how to paint a ceiling. With a roller, you have more control of where your paint is applied. The chance for splatters of paint is reduced, too.
Simply cut in using your paintbrush to avoid getting paint in small, tight areas where you may not want it. Then, wet your roller, apply your paint, and get to work in long, even strokes.
How to Paint a Ceiling with a Sprayer?
There are some instances when painting a ceiling with a sprayer is better than using a roller. That’s usually the case if your ceiling is textured. Here’s how to paint a ceiling with a sprayer:
Fill the paint container of the sprayer to the recommended level according to the manufacturer. Spray a test piece using cardboard. If the test piece doesn’t have any splatters, and if your sprayer doesn’t clog, you’re ready to paint your ceiling.
If the paint doesn’t flow freely from the sprayer, you need to dilute the paint. Double-check your paint can to determine what can be used to dilute it. If it’s water-based paint, you can use water. If not, you’ll need to purchase an appropriate paint thinner.
Add 10% of your dilution substance to 1 litre (L) of paint. Do another test spray to see if it sprays evenly. If so, you’re ready to paint your ceiling! If not, continue diluting the paint in 5% increments until the paint sprays evenly.
Can You Paint Over Mouldy Ceilings or Damaged Ceilings?
You can paint over mouldy ceilings or damaged ceilings. But you don’t want to start right away with ceiling paint. Instead, use a stain-blocking primer to cover imperfections.
A white pigmented primer is perfect to conceal flaws in your ceiling. Once your primer is dried, you’re able to continue painting your ceiling with the colour of your choice.
Painting a ceiling is an excellent way to cover up blemishes or imperfections. It’s also a great way to refresh a room and give it a new look. With this step-by-step guide on how to paint a ceiling, you’re ready to tackle it!
Ready to get started? We’ve got everything you need in our ceiling paint section!

Leona Casey

- Paint & Decorating
9 Best Hallway Paint Ideas to Transform Your Home

- Paint & Decorating
Everything You Need to Know About Buying Paint

- Paint & Decorating
Everything You Need To Know About Textured Paint

- Paint & Decorating,
- Home Décor
How To Paint Interior Walls

- Paint & Decorating
How To Paint Stairs: Everything You Need to Know

- Paint & Decorating