How To Paint Stairs: Everything You Need to Know

Whether your stairs look dated and you’re ready to modernise your home, or you just love the look of a clean and crisp staircase, painted stairs are the way to go!
We’re here to help you with everything you need to know about painting your stairs.
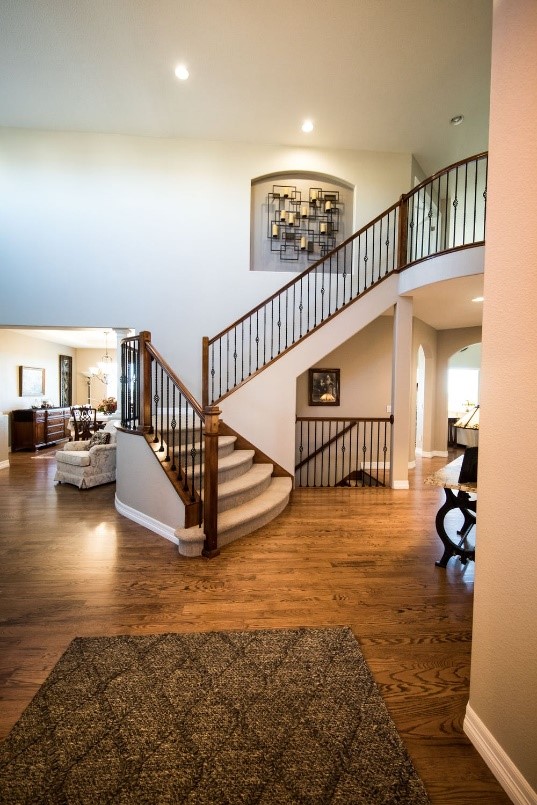
Staircase Anatomy 101
First, let’s start with basic staircase anatomy. This will keep us all on the same page when we dive into our guide on painting stairs.
Handrail - This is the railing along the staircase where your hand goes for balance and support.
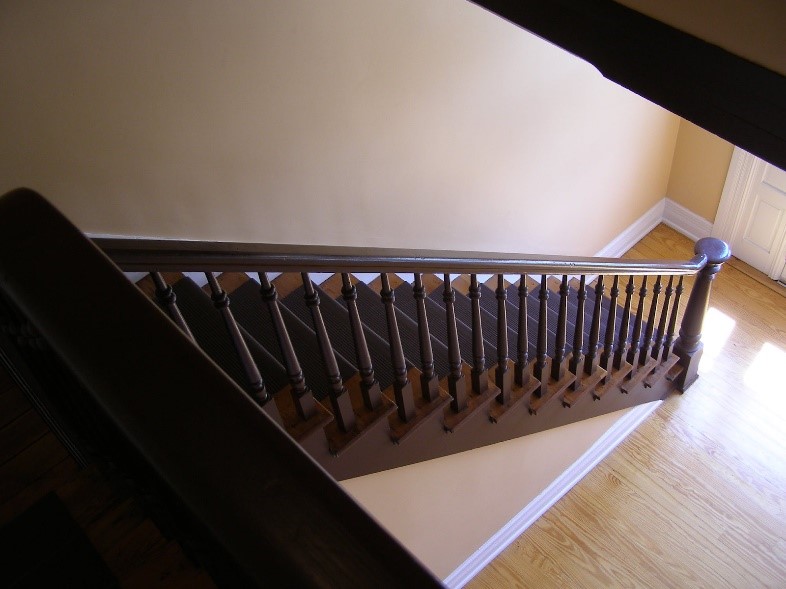
Nosing - The rounded edge to the tread.
Riser - The vertical part at the back of each stair.
Tread - The horizontal part of each stair where your foot actually lands.
Now that we’re clear on the parts of a staircase, we can get into the steps of actually painting your stairs to refresh your home!
What to know before you paint and refinish your stairs
Painted stairs make for a beautiful way to modernise and spruce up your home. But the task is daunting if you’re not sure where to start.
We’re here to answer all of your questions and guide you through painting them yourself!
Painting stairs with carpet: should you paint or stain?
If you’re looking to update your home, the first thing to consider is getting rid of the carpet on your stairs altogether.
Remove the carpet and check what kind of wood is underneath. If you’re lucky, you might find some beautiful wood underneath all of the old carpets! If that’s the case, you’ll have a few more options when it comes to painting your stairs: you can either refinish the treads and risers with stain, paint the treads and risers, or you can do a combination of both techniques by painting the risers and staining the treads.
If you pull up the carpet on your stairs to find chipboard or low-quality wood, it’s best to paint both the treads and risers. Staining this type of wood won’t look high-end and professional, as chipboard and lower-quality wood aren’t made to hold stain well. But painted stairs, even if it’s lower quality wood, will still look beautiful in your home!
What is the best paint to use on stairs?
Your paint shouldn’t cause slipping, it should be easy to clean, and it should hide imperfections relatively well.
The best paint for stairs is one that’s made for flooring. Find one that’s labelled porch and patio or any that’s specifically made to be floor paint.
And as for sheen, anything that’s “glossy” will more than likely be too slippery to use on stairs.
We recommend a “semi-gloss” or a “low lustre” paint. It’s typically one of the best paints for interior stairs since it adds a shine, it’s easy to clean, and it won’t cause anyone to slip down them.
Do you need to prime stairs before painting?
If you are painting your stairs, you should prime them beforehand. A high-quality primer will give your paint a nice, even finish. And more importantly, it will seal off and protect your wood for high-traffic use once you’ve painted your stairs.
How to paint your stairs: the step-by-step guide
If you’ve removed the carpet from your stairs, and you’re ready to paint or stain them, follow our guide.
Prepping your stairs for painting and/or refinishing
Getting them primed is quick and easy with the right know-how.
Step 1
First, you need to remove any old nails or staples from your stairs. Vacuum your staircase to remove dirt, dust, and debris.
Step 2
Sand the treads down with 60 to 80 grit sandpaper. You can use an electric sander to help you move through this step quickly. You may need to sand the corners by hand to make sure everything is nice and even.
Step 3
Sand your risers and trim as well using the same technique as above. Make sure everything is nice and even.
Step 4
Wipe away all dust and debris from sanding. Make sure it’s completely clean before you start staining and painting!
Staining your stairs
Step 1
If you’re staining your treads, you need to do that first. Stain is much more difficult to clean off painted wood than vice versa.
Step 2
Using a brush applicator, start spreading the stain in a light, even coat across the tread. Follow the grain of the wood. Let it saturate the wood by waiting just a couple of minutes. Then, wipe off the excess stain. Stain does not dry like paint does. You must wipe off the excess (otherwise you’ll be left with a sticky, gooey mess)!
Step 3
Repeat step 2 to make sure you’ve given your treads a nice, even coating all around. A second coat will allow for a richer, as well.
Step 4
Let the stain dry for several hours. Check the label to see how long it will take for your stain to dry completely.
Step 5
Once your stain is completely dry, apply a clear oil urethane finish. This finish is designed for high-traffic areas, like stairs. It’ll keep your stairs protected, so you definitely want to buy the highest quality you can! Be sure to check your label’s instructions on how many coats to apply and what to do in between each coat. Each urethane finish is different!
Painting your stairs
Usually, after 24 hours your stain should be completely dry, and you should be ready to paint the risers of your stairs. Or, if you’ve chosen to forego stain altogether, you can start here!
Use our guide for painted stairs that look like you’ve hired a pro:
Step 1
Using painter’s tape, tape off the nosing of the treads. You may also want to tape off the wall and structures on the sides of the risers so you don’t accidentally get paint everywhere.
Step 2
Prime your stairs with a high-quality wood primer. This will make sure the paint adheres to the wood well so it doesn’t start chipping. It will also help to seal the wood off, which protects your painted stairs!
Step 3
Paint two coats on your stairs using a high-quality brush. The colour is completely up to you. If you’ve stained your treads with a darker colour, we recommend using a lighter colour paint to provide balance. This will give your home a modernised, crisp look! Use the similar paint colour as you’ve used for the trim throughout your home.
Step 4
If you’re painting your treads, as well, follow steps 2-3. Make sure you’ve chosen a high-quality primer. Your stairs will need it to stay protected! Choose a paint colour that’s darker to balance your lighter-coloured risers. The overall finish will be rich, clean and crisp painted stairs!
How to protect painted stairs
What good are painted stairs if they don’t hold up well over time?
A big part of this is making sure you use a good primer before painting your stairs and a good urethane finish after you’ve stained them. This will make your stairs more durable for the long haul.
But everyday wear and tear is still a thing to keep in mind. Here are our quick tips for protecting painted stairs so they look just as good as the day after you painted them!
Remove your shoes
To prevent scuffs, scrapes, and scratches, make it a point to remove your shoes in your home, especially before walking on your stairs. Ask your friends and family to remove their shoes, too, when they’re over. This will significantly reduce the scuffs and scrapes, especially if you’re using light-coloured paint.
Clean them when needed
Just like everything else in your house, your painted stairs will collect dust. Use a quick dust rag or a microfiber cloth to get rid of the dust bunnies. In no time at all, your stairs will look as good as new!
Wooden painted stairs ideas
We’ve already touched on our favourite recommendation for painted stairs ideas. We love the look of a darker tread and a light-coloured riser.
But if you’re looking for other painted stairs ideas, we have some for you!
All one colour
If you’re looking to reduce the number of materials or you just like the look, all one colour is a great option for painted stairs.
You can go for a weathered antique look by using a lighter to medium-toned stain on your wood.
You can also go for a bold look by using all one colour paint!
Mock runner
Love the look of a runner, but don’t want more carpet on your stairs? Create a mock runner using paint!
Use painter’s tape to mark off the edges of your “runner.” Paint your borders the colour you like. Then, once it’s dry, move the tape to cover your border. Paint your “runner” the colour you like. And voila! A mock runner for some visual variety in your home.
Multiple coloured risers
Need some more fun than just plain white stairs? Consider painting your risers in different colours. We’ve seen people get really creative with this! You can alternate between two colours that complement each other. Or you can paint each riser a different colour of the rainbow!
If you’re wanting something more eccentric and exciting, this is the way to go.
Stencilled
Not a fan of just boring paint colours? A popular trend right now is to use stencils to paint your risers. There are plenty of stencil designs to choose from for your painted stairs!
Painted stairs add a crisp, clean flair to your home. It’s a relatively easy home renovation project to tackle. Within a weekend, you’ll have an updated look!
Ready to find all of your supplies?

Leona Casey

- Paint & Decorating
A Guide to Picking the Perfect Colour for Your Home’s Exterior

- Paint & Decorating
9 Best Hallway Paint Ideas to Transform Your Home

- Paint & Decorating
A Step-by-Step Guide on How to Paint a Ceiling

- Paint & Decorating
Everything You Need to Know About Buying Paint

- Paint & Decorating
Everything You Need To Know About Textured Paint

- Paint & Decorating,
- Home Décor