How to Fix A Shelf to a Plasterboard Wall

Fixing a shelf to a plasterboard wall is a simple DIY task that anyone can do using this step by guide!
Tools for the Job
Step 1
Knock on the wall to determine whether it is a solid or plasterboard wall. If it makes a hollow sound, the wall is plasterboard. Carry out some visual checks on the wall for sockets or switches. For extra safety, run over the area with a 3-in-1 detector or stud finder to make sure there are no hazards behind the wall.

Step 2
If fixing a shelf to a plasterboard wall, try and make sure at least one of the brackets is attached to a stud in the wall, otherwise, the shelf won't be able to hold much weight without the risk of sagging.
Use a multi-purpose detector to find the nearest stud to where you want to place your shelf.
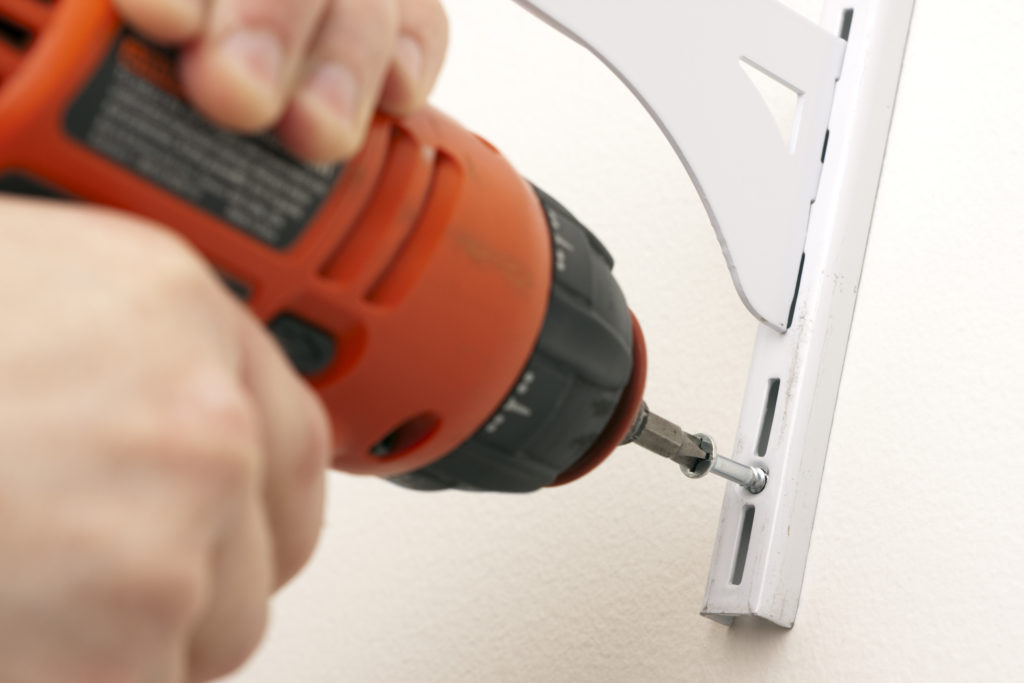
Step 3
Make sure the bracket is vertically level before marking the screw holes. Mark on the stud position of the first bracket. Fix the bracket to the wall with wood screws.
Step 4
Place the spirit level on top of the bracket and use this to find the correct level position for your second bracket.

Step 5
If there is no stud behind where the second bracket is being fixed, use specially-designed plasterboard fixings to secure the bracket.
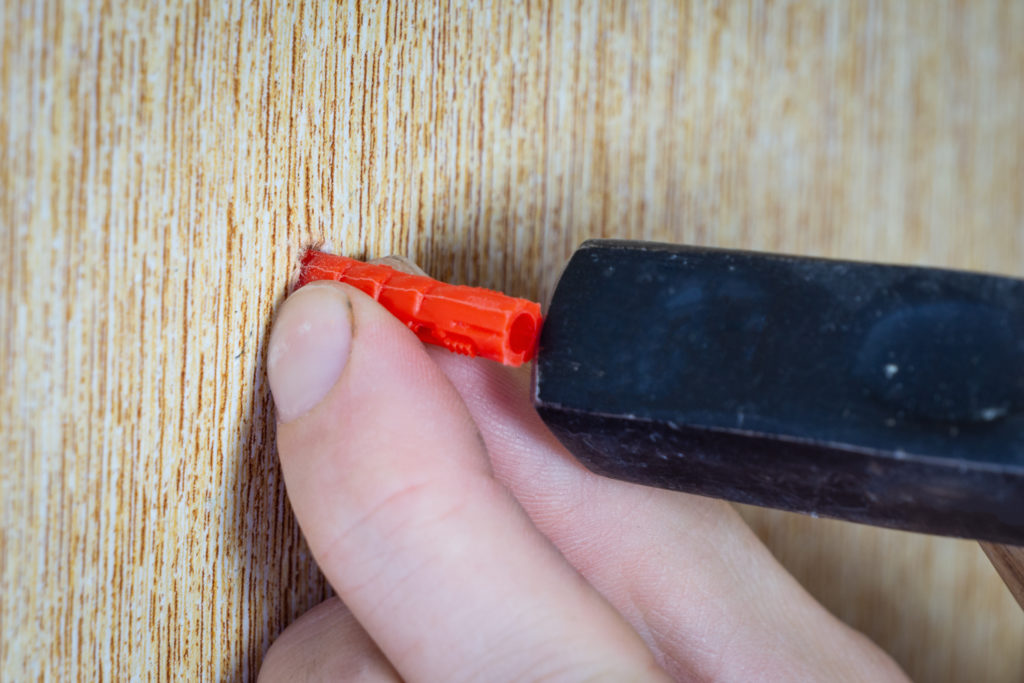
Step 6
Attach the right size steel bit to your drill and drill a hole to fit the rawl plug. Tape an envelope under where you are drilling with masking tape to minimise the dust.
Top Tip
Use a steel drill bit and no hammer action because plasterboard is a soft material, and you don't want to disturb the backing of it. This will then make it difficult for your fixing to grip.
Step 7
Insert the rawl plug into the holes, making sure it is flush with the wall. Gently tap with a hammer to do this if necessary.
Step 8
Secure the second bracket to the wall by inserting and tightening the screws.
Step 9
Finally, secure the shelf to the bracket using woodscrews. Be sure the woodscrews are the correct length as you don't want to screw up through the surface of the shelf.
The end result should leave you with a perfectly level shelf, ready to be used any way you want!
Visit our DIY & building section to get all the products needed for this project.
These methods serve as a guide only. We encourage you to take full caution when undertaking any project within the home.

Sean Hyland

- DIY & Building
DIY Experts Series: Power Drills

- DIY & Building
DIY Interior Wall Panelling Guide

- DIY & Building
How to Drill & Fix to a Plasterboard Wall

- DIY & Building
How to Fit Skirting Boards

- DIY & Building,
- Bathroom & Plumbing
How to Put Up a Bathroom Mirror/Cabinet

- DIY & Building