How to Drill & Fix to a Plasterboard Wall

We all love to decorate our homes with family photos and beautiful artwork or enhance the rooms with mirrors. Follow this step-by-step guide on how to drill & fix a plasterboard wall.
Tools for the Job
Step 1
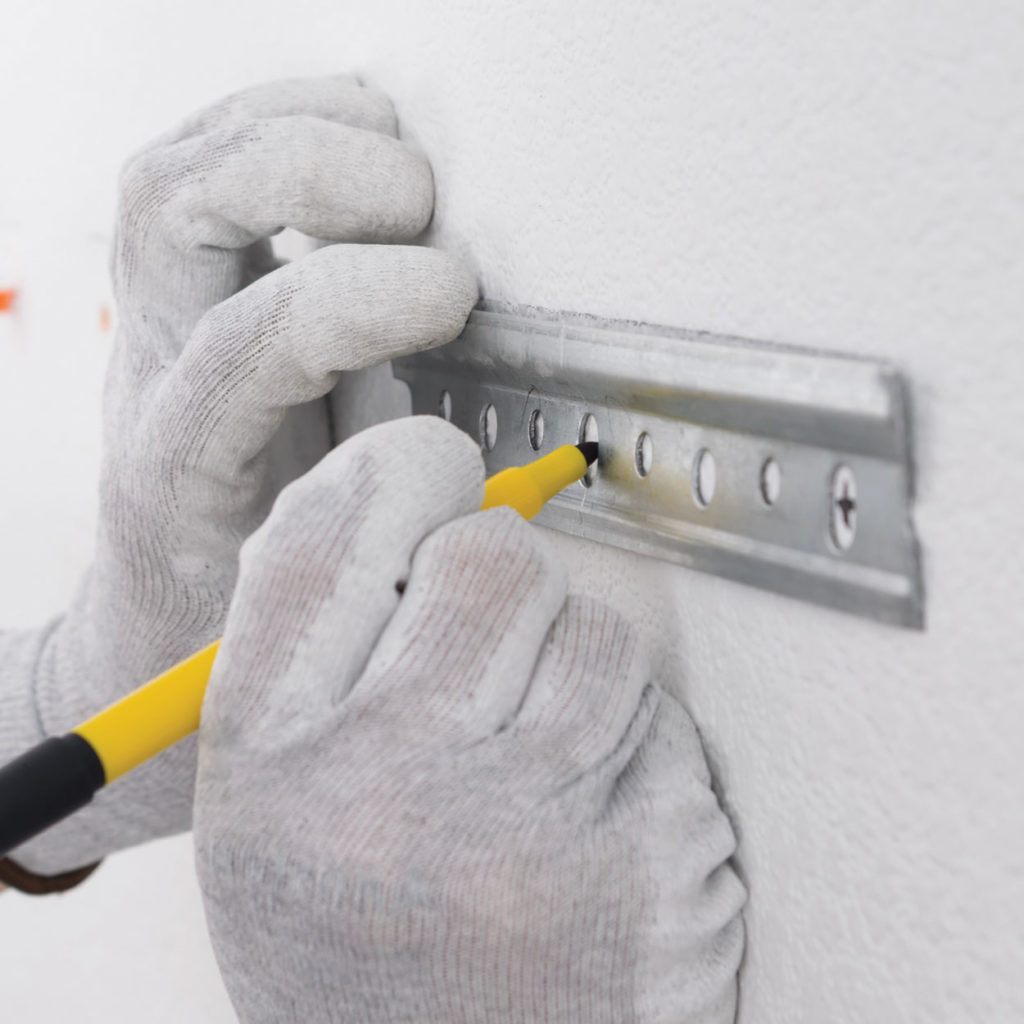
Decide where you would like to fix your object. Knock on the wall to determine whether it is a solid or plasterboard wall. If it makes a hollow sound, the wall is plasterboard. Carry out some visual checks for sockets and switches. For extra safety, use a multi-purpose detector to make sure there are no wires or cables running behind the spot. Mark the spot with a pen or pencil.
Step 2
When securing an item to plasterboard, there are two options. One is to directly secure the item to the timber studs of the plasterboard wall with woodscrews. The other is to use specially designed plasterboard fixings to secure the item. In this case, we are hanging a picture directly on the plasterboard. A couple of options are anchor wall fixings, a spring toggle or screw-in fixings.
Step 3
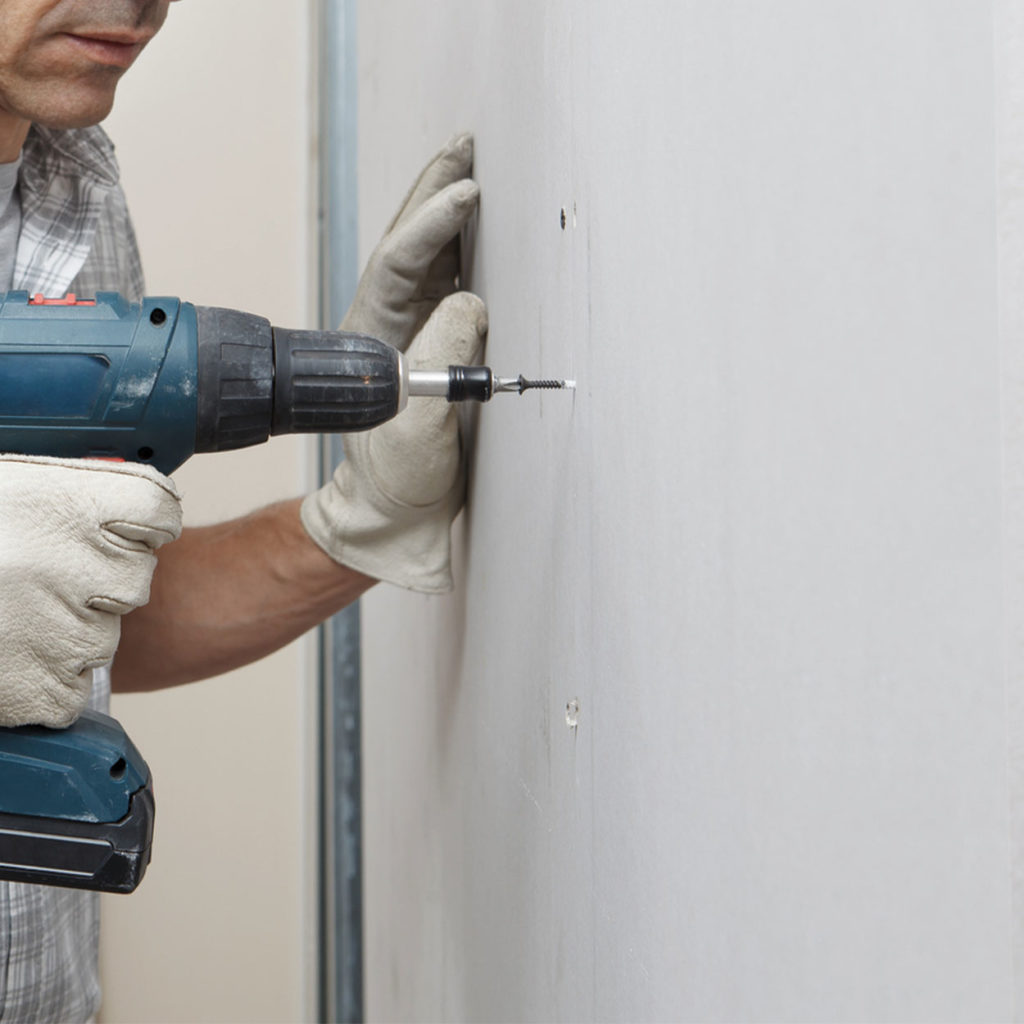
After you have decided on the fixing best suited to your job, use the drill bit size as indicated on the packet to drill a hole in the wall.
Top Tip
The reason we use a steel or wood drill bit and no hammer action is that plasterboard is a soft material, making it important not to disturb the backing that can sometimes happen if you are too aggressive with a masonry bit and hammer action. If the backing is disturbed it can sometimes make it difficult for your fixing to grip.
Step 4
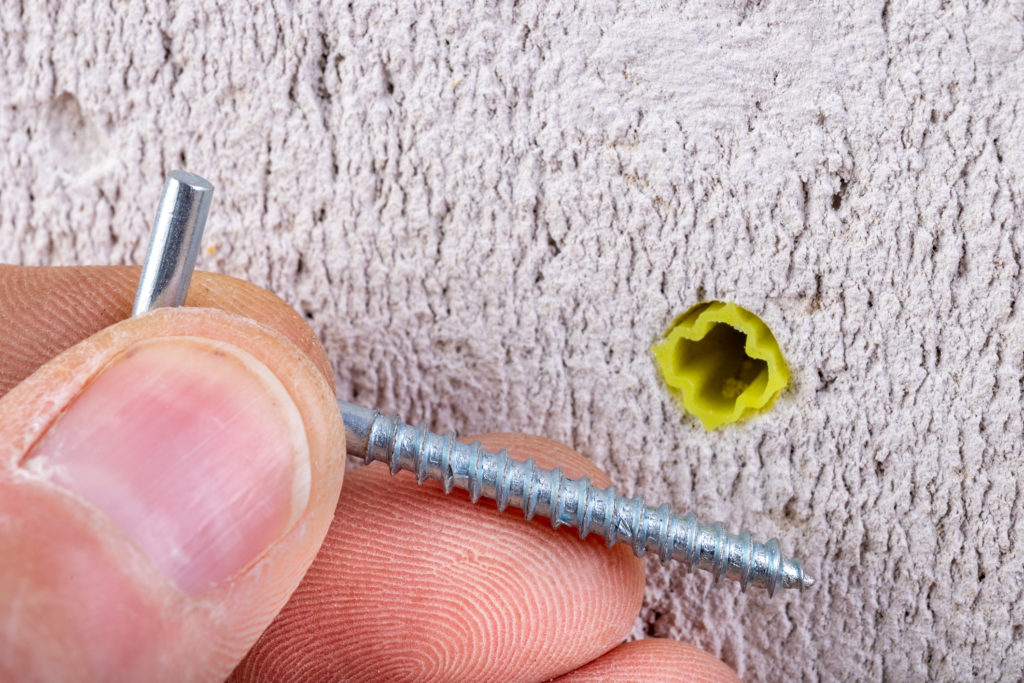
Insert your Rawl Plug fixing into the hole, making sure it is flush with the wall. Use a hammer to gently tap if necessary. Then, Insert your screw into the wall. Leave it protruding slightly to attach your mirror, picture, etc.
Step 5
Hang your object on the screw or hook and make sure it is level.
We hope you found this step-by-step guide easy to follow, and that you have successfully fixed an item to a plasterboard wall. To get stocked up for the project, shop below!
Visit DIY & building materials
These methods serve as a guide only. We encourage you to take full caution when undertaking any project within the home.

Sean Hyland

- DIY & Building
DIY Experts Series: Power Drills

- DIY & Building
How to Bleed a Radiator

- DIY & Building
How to Fit Skirting Boards

- DIY & Building
How to Fix A Shelf to a Plasterboard Wall

- DIY & Building,
- Home Décor
Top Tips for Building Flat Pack Furniture Stress-free

- DIY & Building